
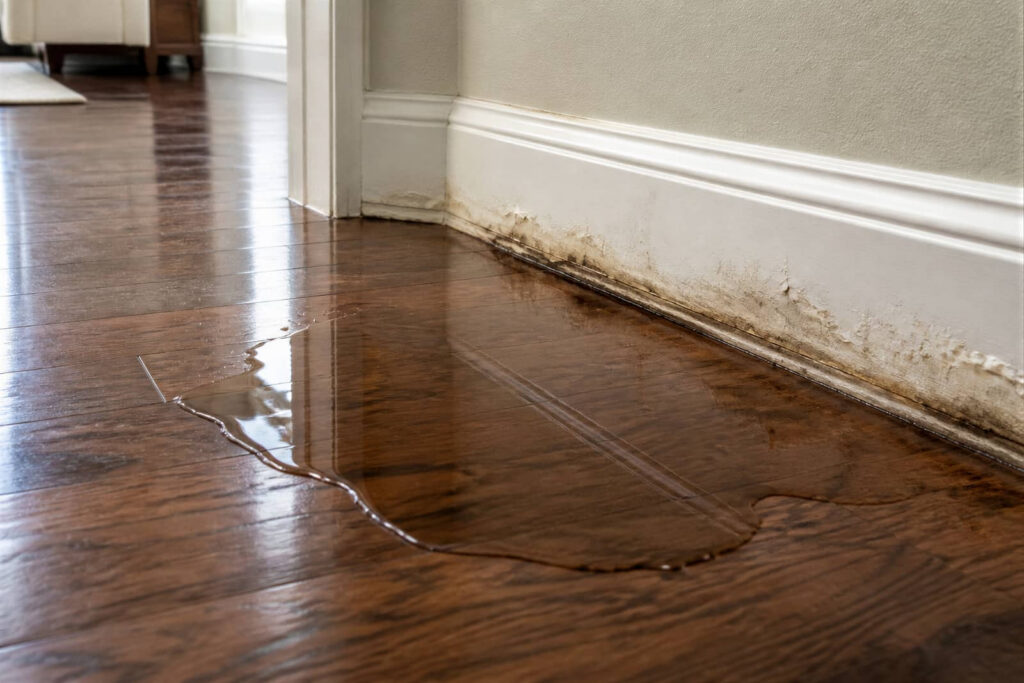
After water damage, you need to inspect moisture quickly and methodically. Moisture Inspection should start with visible signs such as stains, warping, and bubbling paint, then move into hidden spaces like closets and crawlspaces. Use a moisture meter to check walls and floors, and document each reading and problem area. If moisture lingers or mold starts to appear, you’ll need to know when the damage has moved beyond basic checks.
Key Takeaways
- Inspect ceilings, walls, flooring, baseboards, and windows for stains, warping, bubbling paint, and discoloration.
- Check hidden spaces like closets, cabinets, crawlspaces, and under loose flooring for trapped moisture and musty odors.
- Use a moisture meter on drywall, wood, and floors, starting with dry areas for baseline comparisons.
- Record moisture readings, affected locations, and visible damage on a floor plan or inspection log.
- Call restoration professionals if moisture stays high, damage spreads, or odors and swelling continue after drying.
Inspect Visible Water Damage First
Start with what you can see: stained ceilings, warped flooring, bubbling paint, swollen baseboards, and damp drywall often mark the most obvious impact points.
You should map each area and note the size, shape, and severity of the water stains. Look for discoloration around windows, doors, plumbing fixtures, and seams where materials meet.
Check whether surfaces feel soft, brittle, or uneven, because visible distortion can show how far water moved. If you spot mold growth, isolate the area and document it clearly.
Take photos from several angles so you can compare changes later. This first pass helps you prioritize repairs, communicate with your team, and make sure no obvious damage gets missed before you move to deeper inspection steps.
Check for Hidden Moisture
Even when the surface looks dry, moisture can remain trapped behind walls, under flooring, and inside insulation. You need to check hidden sources with care, because leaks often travel along framing, seams, and cavities before you notice them.
Look for warped trim, soft drywall, stained baseboards, musty odor, and peeling paint, since these often signal trapped water. If you’ve had a pipe burst, roof leak, or overflow, inspect adjacent rooms too, not just the obvious area.
Remove small access panels, lift loose flooring edges, and peer into closets, cabinets, and crawlspaces where dampness lingers. Acting early helps your crew stay in control and reduces the chance of mold growth.
Stay methodical, trust the evidence, and keep your inspection thorough.
Use a Moisture Meter on Floors and Walls
A moisture meter helps you verify what your eyes can’t see on floors and walls. You’ll feel more confident when you test each damp area with the right probe or pinless tool.
Different moisture meter types suit different materials, so match the meter to drywall, wood, or tile backer. For reliable reading accuracy, press the sensor flat, avoid metal fasteners, and take repeat readings nearby.
- Check baseline readings on dry areas first.
- Scan the lower wall and baseboard junction.
- Test floor seams, corners, and under trim.
- Compare readings across adjacent surfaces.
When values rise above normal, you know the material likely holds moisture and needs further drying before you move on.
Document Moisture Readings and Problem Spots
Once you’ve taken moisture readings, record each value with its exact location so you can track drying progress and isolate problem areas. Use a notebook, spreadsheet, or inspection app, and note room name, surface type, height above floor, and timestamp.
Mark readings on a floor plan to build clear moisture mapping that shows wet zones, gradients, and dry boundaries. Include visible signs like staining, swelling, musty odor, and warped trim in your damage assessment.
If you test multiple materials, label each sample separately so you can compare changes later. Review your log after each check, then update it consistently.
When your crew shares one accurate record, you’ll spot trends faster, avoid guesswork, and keep everyone aligned on the same drying picture.
Know When to Call Restoration Pros
Call a restoration pro when moisture readings stay elevated after drying efforts, spread beyond the original leak area, or appear inside wall cavities, subfloors, or HVAC components. You’re dealing with water damage that can hide in assemblies and keep feeding mold or structural decay.
A professional assessment gives you a clear damage evaluation and helps you choose the right restoration services.
- Moisture persists after 48 hours of drying.
- Stains return after surface cleanup.
- Substrate readings differ from room air.
- Odors or swelling suggest trapped moisture.
Trust the team that works these problems every day; you belong in a home that’s dry, safe, and verified. Fast action limits repairs, protects materials, and gets you back to normal sooner.
Frequently Asked Questions
How Soon Should Moisture Inspections Begin After Flooding?
You should start moisture inspections within 24 hours of flooding, ideally as soon as the area’s safe. Quick flood response improves inspection timing, helps you detect hidden moisture, and protects your home’s structure and shared peace.
Can Moisture Damage Cause Mold Before Visible Stains Appear?
Yes—you can get mold growth before visible stains appear. You should inspect quickly, dry materials thoroughly, and use preventive measures; hidden moisture fuels mold, damages structures, and spreads odors before you notice discoloration.
What Household Items Help Detect Dampness Without Special Tools?
You can use baking soda, salt crystals, rice bags, and vinegar solutions to spot dampness: they clump, dissolve, or show odor changes. You’ll notice moisture on surfaces, fabrics, and enclosed spaces quickly.
How Often Should Moisture Readings Be Retaken During Drying?
Retake moisture readings every 24 hours, or sooner if drying changes. You’ll spot moisture retention early, refine drying techniques, and stay aligned with your team. Coincidentally, steady checks often reveal hidden rebounds before they spread.
Can Insurance Deny Claims Without Proper Moisture Inspection Records?
Yes, you can face denial if you don’t keep claim documentation and follow inspection protocols. You should record readings, photos, dates, and drying progress so you can support your claim and stay protected.
Recap
So, does drying the surface mean the leak is gone? Not always. You should inspect visible damage first, then check closets, crawlspaces, and other hidden areas for trapped moisture. Use a moisture meter on floors and walls, record each reading, and track problem spots carefully. If readings stay high or mold starts to show, don’t wait. Call restoration pros before minor water damage turns into structural damage or a larger remediation job.