
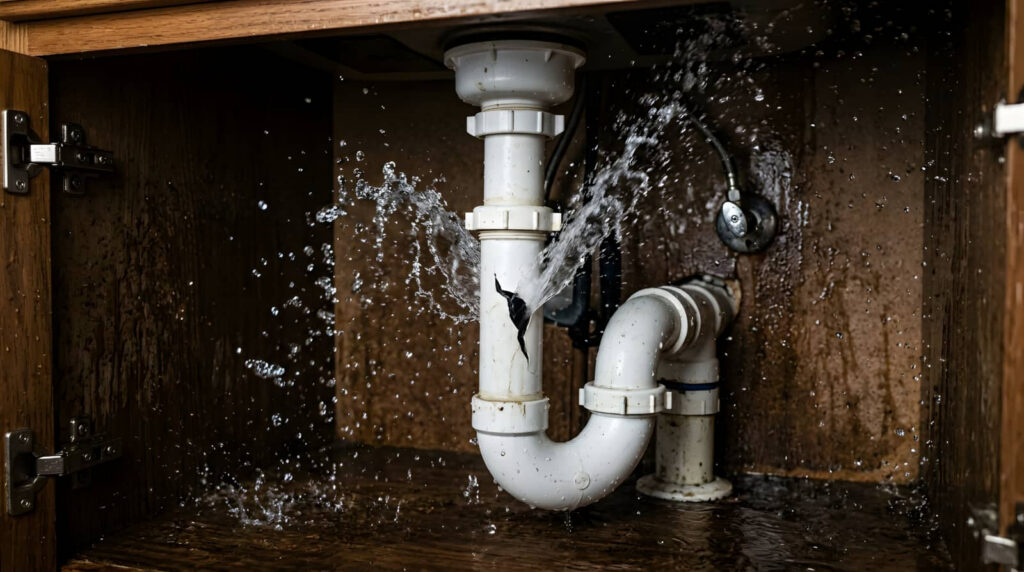
When a pipe bursts, you need to act fast, but you also need to do it in the right order. You’ll shut off the water and power, check the damage, and start removing standing water before it spreads deeper into walls and floors. From there, drying, cleaning, and mold control become critical, and the choices you make next can save materials or make the damage worse.
Key Takeaways
- Shut off the main water supply and cut power to the affected area immediately to prevent further damage and electrical hazards.
- Inspect the burst pipe area and document damage to walls, floors, cabinets, and belongings for cleanup and insurance claims.
- Remove standing water quickly using towels, wet vacs, or pumps, then ventilate with fans and dehumidifiers.
- Dry affected materials thoroughly, removing saturated rugs, insulation, or damaged drywall to prevent mold growth.
- Clean and sanitize dry surfaces, and call professional water damage restoration help for extensive or hidden damage.
Turn Off Water and Power
First, shut off the main water supply if you can reach it safely, then cut power to the affected area at the breaker box. That water shutoff stops new flooding, and the breaker protects you from shock while you work.
If you can’t reach either control without stepping in standing water, wait for a qualified professional. You’re not alone in this; smart first steps keep everyone safer and make cleanup more manageable.
Use a flashlight, not a switch, if the room feels damp. Confirm electrical safety before touching outlets, cords, or appliances.
Once the flow stops, keep others away from the area and stay alert for hidden hazards. Acting quickly helps your team move from emergency mode to recovery with confidence.
Assess the Burst Pipe Damage
Now that the water is off, inspect the burst pipe area carefully to gauge how far the damage spread. You’ll want a quick, systematic damage assessment: check walls, baseboards, flooring, cabinets, and nearby insulation for swelling, staining, or soft spots.
Note any discoloration, buckling, or cracked joints, and photograph everything from several angles. Those records help you track repairs and support insurance considerations later.
If you smell mildew or see sagging materials, mark those areas for follow-up. Stay calm—you’re not alone in this process, and a clear survey gives you control.
Measure the affected space, list damaged items, and separate what can be cleaned from what needs replacement. This first pass helps you plan the next steps with confidence and avoid surprises.
Remove Standing Water Fast
Once you’ve mapped the damage, move quickly to remove any standing water before it soaks deeper into subfloors and wall cavities.
Use pumps, wet vacs, or towels for targeted water extraction, and start at the lowest point so you’re not chasing runoff around the room.
Empty containers often, keep hoses clear, and work methodically so you don’t miss hidden pockets near baseboards or under debris.
If the volume is high, call a pro team that knows the drill; you’re not doing this alone.
Quick removal supports flood prevention by reducing the chance of spreading contamination and structural stress.
Stay organized, wear gloves, and watch your footing.
The faster you clear the water, the sooner your space can recover safely and confidently.
Dry Walls, Floors, and Furniture
Open windows, turn on fans and dehumidifiers, and keep air moving across wet surfaces so moisture doesn’t linger in walls, floors, or furniture. You’ll help materials dry faster by lifting rugs, propping cabinet doors open, and pulling furniture away from walls.
Use drying techniques like gentle heat, airflow, and moisture checks to track progress without overdoing it. If you notice warped baseboards or soft drywall, keep the area exposed and let it dry fully before you close it up.
For furniture restoration, remove cushions, stand pieces on blocks, and dry all sides evenly. Stay patient; rushing traps water inside and can lead to bigger problems later.
You’re handling this the right way, and steady drying sets you up for a cleaner recovery.
Clean and Sanitize Surfaces
Once the surfaces are dry, you should clean them with soap and clean water to remove dirt, residue, and contaminants.
Next, you’ll sanitize any wet or previously soaked areas with an appropriate disinfectant, following the label’s contact time so it can work effectively.
This step helps reduce the risk of mold and bacteria, and it gives you a safer, more stable space to restore.
Surface Cleaning Steps
Before you clean, make sure the damaged area is safe to enter and the power is off if water reached outlets or appliances.
Next, remove standing water with wet vacuums, mops, or towels, then inspect surface materials for stains, swelling, or loose finishes.
Use appropriate cleaning techniques: a mild detergent for hard surfaces, a soft brush for grout, and microfiber cloths for wiping.
Keep moisture control tight by drying as you go and checking hidden seams, baseboards, and corners.
Document damage assessment with photos for insurance claims, and note which restoration methods you use.
Follow safety precautions when handling equipment usage, and ventilate the room well.
These surface cleaning steps also support prevention strategies, helping your home recover faster and keeping your team on the same page.
Sanitizing Wet Areas
After you remove standing water and clear away debris, you should sanitize all wet surfaces to reduce the risk of mold, bacteria, and lingering odors.
Mix the disinfectant exactly as labeled, then apply it to floors, walls, trim, and any hard nonporous items that got wet. Let each surface stay wet for the full contact time so the sanitization works properly.
Use gloves, good ventilation, and clean cloths to avoid spreading contaminants. For porous materials, check whether they can be cleaned safely or need replacement.
These sanitization techniques support mold prevention by limiting the moisture and microbes that let growth start. If you’re unsure, trust the process: careful cleanup helps your home feel safe again, and you’re not handling this alone.
Save What You Can Salvage
Start by sorting everything into three groups: items you can dry and disinfect, items that need professional cleaning, and items that are too damaged to keep.
Handle salvageable items first, because fast damage evaluation helps you protect what still has value. Move papers, photos, clothing, and hard goods to a clean, dry surface.
Check labels and construction before you decide to keep or discard anything. If an item absorbed contaminated water, has swelling, or won’t hold its shape, set it aside for specialist review.
Wipe down nonporous surfaces with approved cleaners, then dry them fully. Keep a simple inventory so you can track losses and recoveries.
You’re not doing this alone; careful sorting gives you control and helps your cleanup team work with you.
Watch for Mold Growth
Watch for early mold signs like musty odors, discoloration, or a slimy film on surfaces, and act quickly if you spot them.
Check hidden damp areas behind baseboards, under flooring, and inside walls, since moisture can stay trapped there.
Dry materials as fast as you can with airflow, dehumidification, and removal of wet items to help stop mold from taking hold.
Spot Early Mold Signs
Look closely at damp areas, because mold can begin growing within 24 to 48 hours after water damage. You may notice musty odors, dark spotting, or fuzzy patches on drywall, trim, or fabric.
Different mold types can appear green, black, white, or gray, so don’t rely on color alone. Check for staining that spreads, peeling paint, or a powdery film. If you catch these early signs, you can act fast and protect your home and your crew.
Keep the area dry, increase airflow, and remove soaked materials promptly. Practical prevention tips include monitoring humidity, cleaning surfaces with approved products, and documenting every change.
You’re not dealing with this alone; a careful, shared response helps stop growth before it becomes a bigger repair.
Check Hidden Damp Areas
Even when surfaces seem dry, moisture can stay trapped inside wall cavities, under flooring, and behind cabinets, where mold can keep growing unnoticed.
You should inspect these hidden spaces with damp detection tools, including a moisture meter and, if needed, a thermal camera.
Check baseboards, closet backs, toe kicks, and the underside of sinks for cool spots, staining, or soft material that suggests hidden moisture.
If you notice a musty odor, treat it as a warning, not a guess.
Keep notes on each area so you and your cleanup team can track patterns and stay organized.
This careful check helps you catch mold risks early and gives you confidence that your home’s recovery is moving in the right direction, together.
Dry Materials Quickly
Once you’ve found hidden moisture, start drying affected materials right away so mold doesn’t get a head start.
Remove wet rugs, baseboards, and insulation if they’re saturated, then separate items so airflow reaches every surface. Use fans to improve air circulation and position a dehumidifier in the smallest closed space you can manage; smart dehumidifier usage lowers humidity fast and helps stop spores from spreading.
Keep windows closed if outdoor air is humid, and check walls, flooring, and cabinets daily for cool spots or musty odors. If drywall stays damp after 24 to 48 hours, cut out the damaged section.
You’re not handling this alone—follow each step methodically, and you’ll protect your home, reduce repair costs, and keep your space healthier.
Call Water Damage Pros
If the water damage is extensive, contaminated, or already affecting walls, flooring, or electrical systems, call a qualified water damage restoration pro right away.
You’ll get emergency response with industrial pumps, moisture meters, dehumidifiers, and targeted drying plans that stop hidden damage from spreading.
A trained team can document conditions, guide insurance claims, and help you track losses with photos and itemized reports.
They’ll also assess structural materials, sanitize affected areas, and verify that moisture levels return to safe ranges.
That support can save you time, reduce stress, and keep your home on a safer recovery path.
You don’t have to handle a major loss alone; the right pros bring experience, equipment, and clear communication when you need it most.
Prevent Another Burst Pipe Emergency
To help prevent another burst pipe emergency, keep your plumbing under close watch and act fast on early warning signs like low pressure, damp spots, frost on exposed lines, or unusual noises in the pipes.
Add pipe insulation, maintain temperature regulation, and schedule regular maintenance so your system stays resilient. A yearly plumbing inspection and seasonal checks catch weak joints before they fail.
Use leak detection devices near sinks, basements, and water heaters to spot trouble early. Keep an emergency kit ready, including shutoff tools, towels, and contact numbers.
- You’ll feel calmer with a clear plan.
- You’ll protect your home and your people.
- You’ll avoid panic when cold weather hits.
- You’ll know when to seek professional advice.
Frequently Asked Questions
How Soon Should I File an Insurance Claim After Pipe Flooding?
File your claim right away, ideally within 24 hours after pipe flooding. You’ll protect coverage, speed emergency response, and document damage before pipe repair starts. Contact your insurer, take photos, and keep receipts for every expense.
Can Contaminated Water Damage Require Special Protective Gear?
Yes—when you handle contaminated water, you should use protective equipment like gloves, boots, and a respirator, because contamination risks can include bacteria and chemicals. You’ll protect yourself and your home while you clean safely.
What Signs Mean Drywall Needs Full Replacement?
You need full replacement when drywall loses integrity, crumbles, sags, stains, smells musty, or stays swollen after water damage dries. If you see soft spots, mold, or delamination, you shouldn’t patch it.
How Do I Document Burst Pipe Damage for Insurance?
You’ll document it with photos, videos, and dated notes; insurers process burst-pipe claims faster when evidence is complete. Record the damage assessment, list affected items, save receipts, and follow the claim process closely.
Are Burst Pipes Covered by Standard Homeowners Insurance?
Usually, yes—you’re covered for sudden burst pipes, but not neglect. Review your policy’s insurance limits, then arrange pipe repair quickly. You can protect your home, file a claim, and feel supported through cleanup.
Conclusion
You’ve now got the basics to clean up burst pipe water damage safely and efficiently. Turn off the water and power, remove standing water fast, and dry everything thoroughly. As you work, check the facts of the damage: wet materials, hidden moisture, and early mold can change your next step. Clean and sanitize each surface, save what you can, and call pros for severe damage. Finally, insulate pipes and monitor pressure to prevent another burst.