
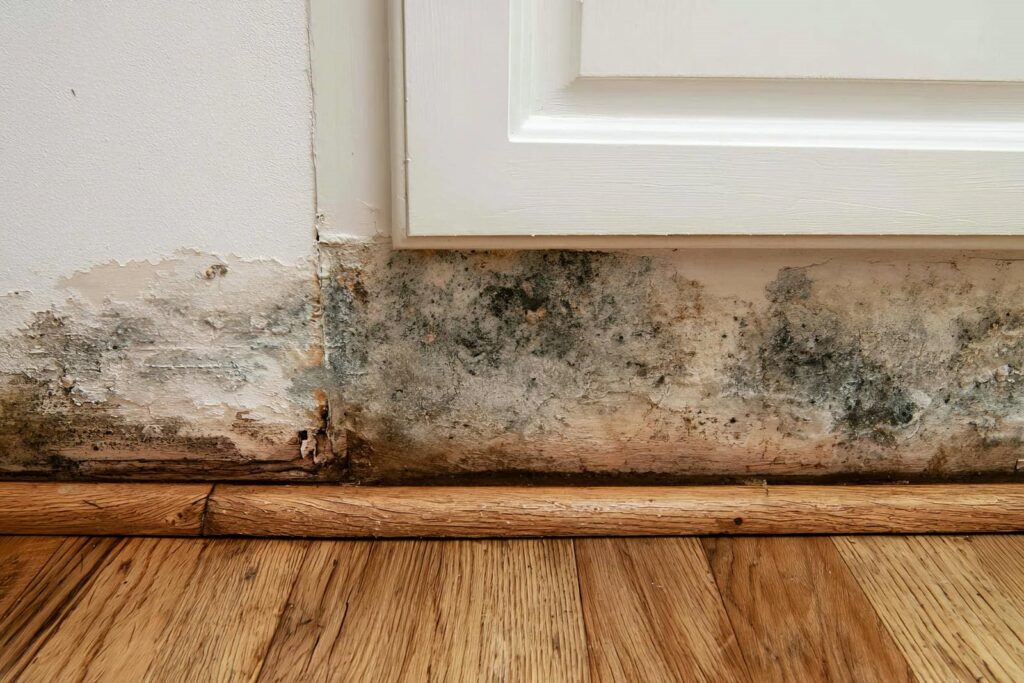
After flooding, you need to act within hours, not days, if you want to stop mold from spreading through walls, floors, and furniture. You’ll need to remove standing water, dry hidden moisture, control humidity, and decide what materials can’t be saved. The right sequence matters, and a few missteps can make cleanup harder. Here’s what to do first, and what to avoid next.
Key Takeaways
- Remove standing water within 24 to 48 hours using pumps or wet vacuums to slow mold growth.
- Dry affected areas quickly with fans, dehumidifiers, open windows, and controlled heat.
- Lower indoor humidity below 60% and monitor hidden moisture daily for damp spots.
- Clean moldy surfaces with EPA-approved products and wear gloves, goggles, and an N95 respirator.
- Discard porous materials like wet drywall and carpets, and call mold professionals for hidden or persistent mold.
How to Stop Mold After Flooding
To stop mold after flooding, you need to act fast: remove standing water, dry all wet materials within 24 to 48 hours, and discard anything that can’t be thoroughly cleaned and dried.
Use preventive measures now: open windows if weather permits, run fans, and improve air circulation with dehumidifiers. Check moisture monitoring tools daily so hidden damp spots don’t linger.
If you see discoloration, musty odor, or soft drywall, apply safe household solutions only on nonporous surfaces. For porous materials, use proven restoration techniques or replace them with mold resistant materials.
Watch for health risks like coughing or eye irritation, and wear gloves and an N95 if you’re sensitive.
Review insurance considerations early, document damage, and save receipts so your cleanup team stays coordinated.
Remove Standing Water Fast
Remove standing water as soon as you can to limit mold growth and material damage.
Pump out pooled water immediately with a submersible pump or utility pump, then switch to a wet vacuum for residual water on floors and in low spots.
You’ll need to keep extracting water until surfaces are no longer saturated.
Pump Water Immediately
Act fast and pump out standing water as soon as it’s safe, because the longer water sits, the more quickly mold can start to grow.
You should match pump types to the depth and volume of water: a submersible pump handles deeper flooding, while a utility pump works well for steady water removal from basements and crawlspaces.
Place the pump at the lowest point, keep the discharge hose angled away from the structure, and monitor flow so it doesn’t back up.
Shut off power to affected areas before you enter. Clear debris that could clog intake screens, and move quickly but carefully.
When your team drains water promptly, you reduce moisture load, protect materials, and create better conditions for the next cleanup steps.
Use Wet Vacuums
Once you’ve shut off power and cleared the area, use a wet vacuum to pull up shallow standing water fast, especially in rooms, basements, and crawlspaces where pumps can’t reach every corner.
Work from the farthest point toward the exit so you don’t trap yourself in pooled water. Empty the tank often, and keep the hose low for better suction.
If the water is dirty, wear gloves and boots, then sanitize the tank after each pass. These vacuum tips help you reduce moisture before mold growth starts.
Check carpets, baseboards, and under furniture for hidden water, and make repeat passes until surfaces feel only damp.
You’re not just drying space—you’re protecting your home and everyone in it.
Dry Wet Walls, Floors, and Furniture
You should dry wall cavities as soon as possible by opening access points and using airflow or dehumidification to remove hidden moisture.
Pull moisture from floors with fans, dehumidifiers, and, if needed, controlled heat to speed evaporation without trapping water under surfaces.
Move furniture out of the wet area and dry it quickly, since fast action can often prevent warping, swelling, and mold growth.
Dry Wall Cavities
Drywall cavities often trap moisture long after surface water disappears, so you need to open them up and verify that the framing, insulation, and backing are actually dry.
Use a dry wall inspection to check for hidden staining, soft gypsum, and damp fasteners. If you find wet insulation, remove it and expose the cavity until the lumber reads dry on a moisture meter.
Improve wall cavity ventilation with controlled airflow, but don’t blast contaminated dust into clean rooms. Keep the area isolated, wear PPE, and bag debris right away.
When you work methodically, you protect your crew and help everyone restore the space with confidence.
Watch corners, seams, and bottom plates carefully, because lingering moisture there can keep mold active and spread odor.
Lift Moisture From Floors
After you’ve opened wet wall cavities and confirmed the framing is drying, shift attention to the floor assembly and any furniture that soaked up floodwater.
You need to lift floor coverings, remove trapped padding, and expose subflooring so air can move across all wet surfaces. Set axial fans to push air along the floor, and run dehumidifiers to pull vapor from the room.
If you can, create small access points in concealed cavities so you can verify moisture absorption isn’t lingering under finishes. Check materials with a meter at multiple spots, not just the edges.
Keep pathways clear, because crowded rooms slow floor drying and raise the risk of hidden mold. Work methodically, and your crew or household can stay aligned on the same dry-out plan.
Salvage Furniture Quickly
Move salvaged furniture out of the wet zone as soon as you can so trapped moisture doesn’t keep feeding mold growth.
You should separate pieces by material, check joints, padding, and hidden seams, and document damage during furniture assessment. Move solid wood and metal items first; they tolerate drying better than upholstered or particleboard pieces.
Wipe mud off with clean water, then set items in a dry, ventilated space with spacers underneath. Use fans and dehumidifiers, but don’t blast fragile finishes.
Remove cushions, drawers, and loose panels to speed drying. If you see swelling, warping, or musty odor, isolate the item and apply restoration techniques only if they’re safe for the material.
Acting fast keeps your team coordinated and helps you save what’s worth restoring.
How to Clean Mold With EPA-Approved Products
When you clean mold after flooding, choose an EPA-approved product labeled for mold and mildew control, then follow the manufacturer’s directions exactly for dilution, contact time, and surface compatibility.
Wear gloves, goggles, and an N95, and ventilate the area so you and your household stay safer.
Apply the cleaner to the moldy surface, keep it wet for the full contact time, then scrub with a disposable brush or cloth.
Rinse if the label requires it, and dry the area completely to support mold prevention strategies.
Verify the product meets EPA guidelines before use, especially on painted walls, tile, or sealed wood.
If growth returns, repeat the treatment promptly.
You’re not tackling this alone; careful, methodical cleaning helps your space recover faster and keeps your team focused.
Throw Out Porous Materials That Hold Mold
Porous materials that stay wet after flooding often trap mold deep inside their fibers, so you should discard them instead of trying to clean them. That includes moldy drywall, contaminated carpet, insulation, ceiling tiles, and upholstered items.
You can’t reliably remove spores once water has penetrated the material’s core, and patching over damage only keeps your space unsafe. Bag each item, seal it, and move it out of the home promptly so your household can start recovery with a clean baseline.
Wear gloves, long sleeves, and an N95 respirator while handling waste. If local rules require special disposal, follow them before hauling debris.
Removing these materials quickly helps your team protect the structure and supports a healthier return to normal.
Use Fans and Dehumidifiers to Lower Humidity
Once you’ve removed saturated materials, dry the remaining structure fast by running fans and dehumidifiers together.
Set up air movers to sweep moisture off walls, floors, and framing, then exhaust that air toward the dehumidifier intake. Good fan placement prevents dead zones and speeds evaporation across the whole room.
Keep doors open for airflow unless you need to isolate one area for humidity control. Empty dehumidifier reservoirs often, or route drainage to a safe outlet so the unit can run nonstop.
Check relative humidity with a meter; aim to keep it below 60%. Move equipment as surfaces dry, and keep it away from wet insulation or debris.
You’ll reduce mold-friendly conditions quickly and protect the space you’re restoring.
Call Mold Remediation Experts Right Away
If you’re still seeing musty odors, visible growth, or damp materials after drying efforts, call a mold remediation expert right away.
You need a fast mold assessment to identify hidden colonies behind walls, under flooring, and inside HVAC components. Trained technicians use professional equipment to measure moisture, contain spores, and remove contaminated materials safely.
They’ll also verify whether water damage has spread to insulation or framing, so you can avoid repeat growth. Don’t wait for symptoms to worsen or for odors to fade on their own.
When you bring in experts, you join a community of homeowners who act early, protect indoor air, and restore their spaces with confidence.
Fast intervention reduces repairs, limits disruption, and helps your home return to normal sooner.
Frequently Asked Questions
How Soon Should Mold Testing Be Done After Flooding?
You should test for mold within 24–48 hours after flooding, because the mold growth timeline starts quickly. Use professional testing methods, and you’ll protect your space, detect hidden contamination, and join others acting fast.
Can Insurance Cover Professional Mold Removal Costs?
Yes—your insurance can cover professional mold removal, but it depends on insurance policies and coverage limits. As the saying goes, “an ounce of prevention is worth a pound of cure”; review exclusions, document damage, and file quickly.
Which Hidden Areas Commonly Harbor Mold After Floods?
You’ll often find mold in hidden spaces like wall cavities, under flooring, inside cabinets, and behind appliances, where moisture sources linger. Check crawlspaces, insulation, ductwork, and ceiling voids; those areas trap dampness fast.
Is It Safe to Stay Home During Minor Mold Cleanup?
No, you shouldn’t stay home unless you’ve done a quick home assessment and confirmed safe air quality. Use mold safety cleanup precautions, wear protection, isolate the area, and keep windows open while you work.
What Health Symptoms Suggest Mold Exposure After Flooding?
You may notice mold symptoms like coughing, wheezing, congestion, fatigue, allergy reactions, skin irritations, or worsening respiratory issues. If you’ve got asthma, headaches, or fever, seek medical care and leave the damp area fast.
Final Thoughts
If you act fast after flooding, you can stop mold before it spreads. You’ve seen the theory: if you remove water within 24 to 48 hours, dry materials thoroughly, and keep humidity below 60%, mold growth should be limited. Test that claim in your own cleanup. Use EPA-approved cleaners, wear protective gear, and discard porous items that can’t be salvaged. When damage is extensive, call mold remediation experts right away.