
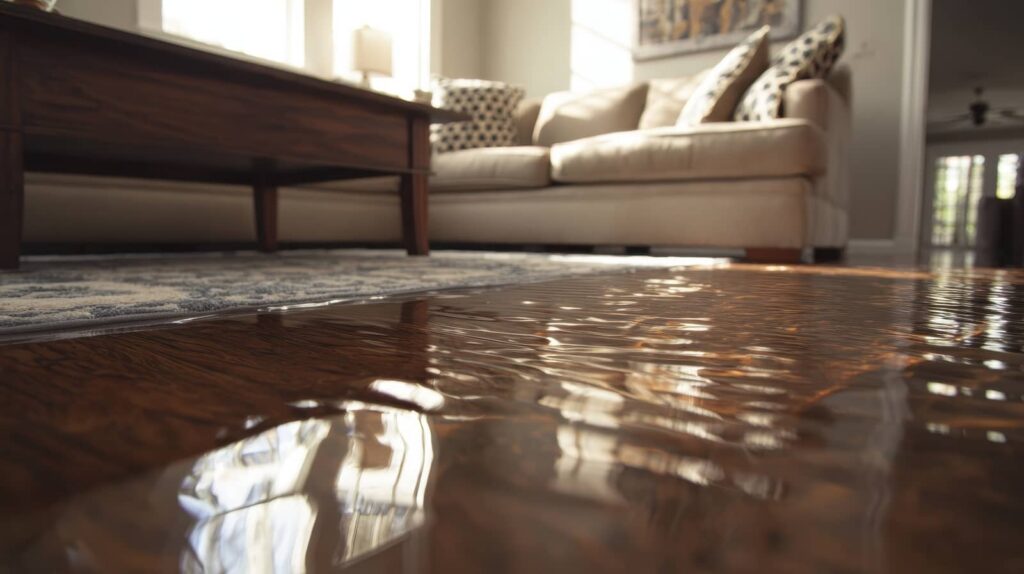
Just when you notice the water creeping under the door, you’re also facing the clock on damage. Flooded House Cleanup and Restoration starts with assessing safety, shutting off power and water if you can do so safely, then removing standing water and drying the structure quickly. Some materials can be saved, while others may need removal, and hidden moisture may already be feeding mold. The next steps will help you restore the home without missing what matters most.
Key Takeaways
- Shut off electricity, gas, and the water source before entering, and wear protective gear for safety.
- Remove standing water with pumps or a wet/dry vacuum, then use fans and dehumidifiers to dry the area.
- Clean and disinfect all affected surfaces promptly to reduce contamination and mold growth.
- Check for hidden moisture in walls, flooring, and insulation using moisture meters or infrared cameras.
- Have professionals inspect electrical, HVAC, and plumbing systems before restoring power and repairing damage.
Assess Flooded House Safety
Before you enter a flooded house, make safety your first priority: shut off electricity and gas if you can do so without stepping into standing water, and never assume the structure is stable until you check for visible damage.
Put on boots, gloves, and a mask, then look for sagging ceilings, cracked walls, shifted foundations, and broken glass. If you smell gas, hear hissing, or see sparks, leave immediately and call professionals.
Keep kids, pets, and neighbors outside the hazard zone. Use a flashlight, not candles, to inspect dark areas. Stay alert for slippery floors and hidden debris.
This flood safety check is part of emergency preparedness, and it helps your household stay protected while you plan the next safe step together.
Stop Water Damage at the Source
Once the area is safe, stop the water at its source by shutting off the main water supply, closing individual fixture valves, or disconnecting the damaged appliance if you can do so without risk.
Use water source identification to trace leaks from supply lines, toilets, sinks, or nearby equipment, then verify the flow has ended. If the source isn’t obvious, check for damp sounds, active drips, or a failing hose connection.
Stay calm; you’re not alone in this step.
- Protect your home from more damage.
- Protect your family’s routine and peace of mind.
- Protect your recovery timeline with preventive measures.
Document what you find, and if you can’t isolate the leak safely, call a licensed plumber or restoration professional.
Remove Standing Water
Start by removing standing water with a wet/dry vacuum, submersible pump, or extraction truck, depending on the depth and area affected.
You’ll work faster if you move from the highest remaining water to the lowest and keep cords, outlets, and wet materials clear of the work zone.
Once the bulk water is out, set up air movers and dehumidifiers right away to speed drying and reduce the risk of mold.
Water Extraction Methods
Standing water must come out quickly to limit structural damage, mold growth, and contamination, and you should match the extraction method to the amount of water present.
For shallow pooling, use wet vacs and mops; for deeper flooding, deploy sump pumps and portable extractors. Set water barriers at doorways to keep runoff contained and protect adjoining rooms. If the water is dirty, wear gloves and boots and work in one direction so you don’t spread debris.
- You’ll feel more in control when the water level drops fast.
- Your home’s structure gets a better chance to recover cleanly.
- Your family can stay safer while you guide the cleanup.
Check corners, closets, and under cabinets, because hidden water can linger.
Drying Equipment Setup
As the remaining water is removed, place fans, dehumidifiers, and air movers so they can pull moisture out of walls, floors, and fixtures as quickly as possible.
You’ll get better results when you keep pathways open and aim airflow across wet surfaces, not directly into corners.
For proper dehumidifier placement, set units in the dampest rooms, close doors when you can, and empty reservoirs or route drains continuously.
Check air mover configuration so each machine overlaps the next, creating a steady sweep that lifts moisture without dead spots.
Raise cushions, open cabinets, and remove baseboard covers if needed.
Monitor humidity daily and move equipment as materials dry.
You’re not doing this alone; these steps help your home recover faster and give your cleanup team a clear, organized plan.
Dry Walls, Floors, and Belongings
Open windows, run fans and dehumidifiers, and keep air moving across walls, floors, and furniture to speed drying.
Check for any remaining standing water and remove it right away so moisture doesn’t keep spreading into materials.
Move salvageable items to a dry area, clean them as needed, and let them dry completely before you return them.
Airflow and Ventilation
Good airflow helps moisture leave your home faster, so start by opening windows and doors when outdoor conditions are dry and safe. Then use fans to move air across wet walls, floors, and belongings.
Strong air circulation supports moisture control, and smart ventilation techniques protect air quality while you work. Place fans to create cross ventilation, and adjust fan placement so air reaches corners without blasting damp surfaces directly.
Monitor indoor humidity with a hygrometer; if it stays high, add dehumidification methods to improve airflow efficiency. Keep air filtration running if you have it, especially when dust or odors linger.
- You’re not alone in this cleanup.
- Small, steady steps build progress.
- Your home can feel safe again.
Remove Standing Water
Now remove any standing water as quickly as you can, since pooled moisture soaks into floors, baseboards, drywall, and furnishings the longer it sits.
Use a wet/dry vacuum, pump, mop, or sump equipment based on depth and access; these water removal techniques help you work faster and reduce standing water hazards like slips, mold growth, and material swelling.
Start at the lowest points and move toward exits so you don’t trap water behind barriers. Wear gloves and boots, and shut off power to affected areas before you step in.
Check hidden pockets under appliances, cabinets, and rugs, because water often lingers there. As you clear each space, you’re creating a safer, steadier home environment for everyone recovering with you.
Dry Salvageable Items
Once the standing water is gone, you need to dry salvageable materials quickly to slow mold growth and limit permanent damage. Open windows, run fans and dehumidifiers, and remove wet baseboards so air can move behind walls.
Lift rugs, separate books, and stand furniture on blocks. Blot wet fabrics, then wash and dry them fast. Document every item for insurance claims before you move it, keeping photos and notes organized.
If drywall stays swollen, flooring cups, or odors linger, call restoration services right away.
- You’re protecting what matters most.
- You’re lowering health risks for everyone in your home.
- You’re giving your space a real chance to recover.
Check daily for damp spots, and keep drying until surfaces feel fully dry and stable.
Decide What Can Be Salvaged
Before you bring anything back into the house, sort each item into three groups: salvageable, repairable, or unsafe to keep.
Start with salvage priorities: irreplaceable documents, photos, and sturdy furniture. Then review the emotional impact of each choice, because some items matter more to your family than their price tag suggests.
You can keep materials that stayed structurally sound and never touched contaminated water. Mark questionable pieces for professional evaluation instead of guessing.
Set aside anything with swelling, warping, persistent odors, or hidden cavities that trap moisture. When you decide carefully, you protect your home, your budget, and the people who live there.
This process can feel heavy, but you’re not doing it alone—you’re rebuilding a safe, familiar place, one considered decision at a time.
Clean Flooded Surfaces
With the salvageable items set aside, you can start cleaning the flooded surfaces that remain. Put on gloves, boots, and eye protection, then gather cleaning supplies, disinfectant, buckets, and absorbent cloths.
Scrub each hard surface with clean water and detergent, working from top to bottom for better surface protection. Rinse well, then sanitize according to label directions. Keep the area ventilated, and dry it as quickly as you can to support mold prevention and reduce damage.
- You’re not alone—steady progress matters.
- You’re protecting your home and your peace of mind.
- You’re building a safer space for everyone.
Document every step with photos and receipts for flood insurance claims. Replace items that can’t be cleaned safely, and keep moving room by room until the space feels manageable again.
Find Hidden Moisture and Mold
Even after visible water is gone, moisture can linger inside walls, under flooring, and behind cabinets, so you need to check these hidden areas right away.
Use moisture detection tools, like a meter or infrared camera, to spot damp pockets you can’t see. Pull back baseboards, lift carpet edges, and inspect insulation, drywall seams, and cabinet backs for swelling, discoloration, or musty odors.
If you find wet materials, keep the area ventilated and dry it quickly to support mold prevention. Watch for fuzzy growth, dark spots, or peeling paint, and treat any suspect area as contaminated until you confirm it’s dry.
When you work carefully, you protect your home and join the many homeowners who get through flood cleanup with confidence and control.
Restore Essential Systems
Before you turn anything back on, have a qualified electrician inspect your wiring, outlets, breaker panel, and any submerged equipment.
Then check your HVAC system and plumbing for flood damage, contamination, and leaks so you don’t circulate moisture or create new failures.
Once those essential systems pass inspection, you can restore power, heat, and water with more confidence.
Electrical System Inspection
Once the structure is dry enough to begin restoration, have a licensed electrician inspect the electrical system before you turn anything back on. You’re protecting your home and everyone in it with careful electrical safety and a full circuit assessment.
They’ll test outlets, switches, panels, and hidden wiring for moisture, corrosion, and insulation damage. Don’t reset breakers or energize circuits until each issue is cleared.
- You avoid shock hazards that can’t be seen.
- You reduce the risk of fire after cleanup.
- You get clear next steps, not guesswork.
If your home has been through flood damage, you’re not alone. A thorough inspection helps you move forward with confidence, knowing the system is safe enough for your household again.
HVAC And Plumbing Checks
After the electrical system has been cleared, turn your attention to HVAC and plumbing so the home can function safely again.
Start with HVAC filters, ductwork, and visible components; replace wet filters, dry the system, and schedule professional system maintenance before you run it.
Check condensate lines and drainage solutions to prevent hidden leaks, then test humidity control to protect air quality and limit mold growth.
For plumbing inspections, look for cracked pipes, loose fittings, slow drains, and damaged shutoff valves.
Flush lines only after you confirm they’re clean and stable.
If floodwater reached equipment, consider equipment upgrades that improve energy efficiency and resilience.
You’re not fixing this alone—careful checks now help your household settle back in with confidence and comfort.
Repair Flood Damage
Start by repairing the structural and material damage the flood left behind so your home can dry out safely and fully. Remove warped drywall, damaged insulation, and soaked flooring, then inspect framing for softness, staining, or movement.
If you’re filing flood insurance, document every loss before you replace anything. Trusted restoration companies can stabilize rooms, dry hidden cavities, and match repairs to local code.
- You’ll feel calmer when the walls stop crumbling.
- You’ll regain confidence as each room becomes usable again.
- You’ll belong in your home again when the damage no longer defines it.
Patch, seal, and replace only what’s compromised, then test surfaces for remaining moisture. Keep your repairs organized so each step brings you closer to a safe, solid home.
Prevent Future Flood Damage
To reduce the chance of another flood, inspect your property for weak points and make targeted upgrades now. Check grading, gutters, downspouts, seals, and foundation cracks so water moves away from your home.
Install backflow valves, extend downspouts, and schedule sump pump installation with battery backup to keep your basement protected during outages.
Use flood resistant landscaping with native plants, swales, and permeable surfaces to slow runoff and absorb excess water.
Inside, store valuables above flood level and keep emergency supplies ready. Test drains and alarms twice a year, especially before storm season.
When you take these steps, you’re joining a prepared community that protects homes together and reduces risk with practical, lasting defenses.
Frequently Asked Questions
How Do I Document Flood Damage for Insurance Claims?
Photograph every affected area, then build a detailed inventory of damaged items, noting dates, estimates, and serial numbers. Keep receipts, document water lines, and back everything up digitally so you’ll feel supported and organized.
Should I Hire a Professional Restoration Company or DIY?
You should weigh a professional restoration company against DIY like a compass in fog. Compare cost comparison and safety concerns; if water’s contaminated or damage’s extensive, hire pros. For minor issues, you can handle cleanup safely.
What Permits Are Needed for Major Flood Repairs?
You’ll usually need building, electrical, plumbing, and possibly zoning permits for major flood repairs. Check flood repair regulations and local building codes first. Your inspector or contractor can guide you, so you’re not managing this alone.
How Long Does Flood Damage Restoration Usually Take?
Typically, you’ll need one to six weeks, depending on flood damage factors, drying time, and repairs. Your restoration timeline may extend if mold, structural issues, or permits arise, but you’re not alone.
Can I Stay in My Home During Partial Flood Cleanup?
You can stay only if flood safety checks pass and crews isolate damaged areas. If contamination, mold, or electrical hazards exist, you’ll need home evacuation. Keep barriers closed, follow instructions, and coordinate closely with restoration professionals.
Recap
By acting quickly, you can greatly reduce long-term damage after a flood. Mold can begin growing within 24 to 48 hours, so your first day matters most. Keep checking for hidden moisture, document every repair, and restore systems only when they’re safe and dry. You don’t have to fix everything at once, but each careful step helps protect your home, your health, and your budget from further loss.