
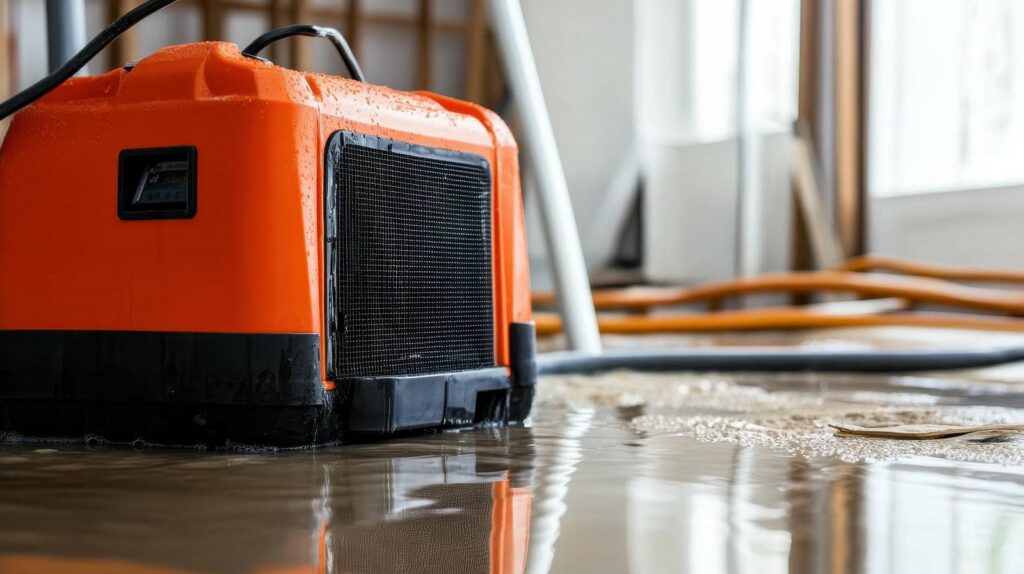
You don’t need to wait for the water to “go down” before acting when dealing with a flooded house. First, shut off the source if you can do so safely, then cut power to the flooded area and check for structural hazards. Next, use a pump for standing water and a wet vac for smaller sections, removing carpet and debris as you go. After that, drying and sanitizing become critical, because what remains in hidden spaces can cost you later.
Key Takeaways
- Shut off the main water source and electricity if safe, then document damage before cleanup.
- Use pumps for deep standing water and wet/dry vacuums for smaller flooded areas.
- Wear protective gear, remove debris, and clear carpets, padding, and damaged materials promptly.
- Dry the area with fans and dehumidifiers, aiming airflow into walls, corners, and baseboards.
- Sanitize hard surfaces and monitor for mold, keeping humidity below 60% and removing wet materials quickly.
Stop the Flood Source Before Cleanup
Before you start removing water, you need to stop the source so the flooding doesn’t continue. Find the shutoff for the main supply line, close it fully, and verify that water isn’t still entering the house.
If the problem comes from a burst pipe, broken appliance line, or overflowing fixture, isolate that branch so you can work safely and efficiently. When outside runoff is the cause, redirect flow away from the foundation with temporary barriers, then document conditions for water damage assessment.
These flood prevention strategies help you limit additional loss and protect the cleanup area. Stay calm, move methodically, and keep everyone in the home informed so you’re working together.
Once the source is controlled, you can begin extraction with confidence and better results.
Check for Electrical and Structural Damage
Once the water source is controlled, you should check for electrical and structural damage before you begin extraction.
Turn off power at the main breaker if you can reach it safely, and never touch wet outlets, cords, or appliances. Use electrical safety as your first filter: if anything sparks, hums, or feels warm, keep away and call a licensed electrician.
Next, inspect floors, walls, ceilings, and support members for sagging, cracking, or shifting. Test structural integrity by looking for bowed framing, softened drywall, and loose trim.
If you notice major deformation, leave the area and get professional help. You and your team stay safer when you treat hidden hazards as real, because a flooded house can look stable while still failing underfoot.
Gather the Right Cleanup Gear
Before you start removing water, put on protective safety gear like gloves, waterproof boots, and a mask to reduce exposure to contaminants.
Gather water removal tools such as a pump, wet/dry vacuum, buckets, mops, and absorbent towels so you can move water out efficiently.
Stock cleaning supply essentials, including disinfectant, bleach as needed, scrub brushes, and trash bags, to clean and sanitize surfaces after the standing water is gone.
Protective Safety Gear
When you start cleanup, suit up with the right protective gear so you can work safely around contaminated water, sharp debris, and hidden hazards.
Choose waterproof boots with slip-resistant soles, long sleeves, and pants that you can wash or discard after use. Select gloves types based on the mess: nitrile for light contamination, heavy rubber for sludge, and cut-resistant gloves if debris is jagged.
For your face, use mask materials that filter fine particles and help block mold spores; a tight seal matters more than style. Add goggles or a face shield to protect your eyes from splashes.
Keep a hard hat nearby if ceilings or fixtures are unstable. When you gear up properly, you’re not just protected—you’re part of a prepared cleanup team.
Water Removal Tools
Gather the tools that can move water fast and safely: a submersible pump for deep standing water, a wet/dry vacuum for smaller pools and residual moisture, heavy-duty extension cords with GFCI protection, buckets, mops, squeegees, and a garden hose for directing discharge outdoors.
Add a sump pump if your basement setup allows it, and keep a water extractor ready for tight corners and upholstery.
Check that each vacuum hose is intact, firmly attached, and long enough to reach the wettest areas.
Position equipment on dry surfaces before you start, and route cords away from water paths.
When the bulk water drops, use your dehumidifier selection to match room size and moisture load.
You’ve got this: the right tools help your crew work faster, safer, and together.
Cleaning Supply Essentials
Stock your cleanup kit with disinfectant, detergent, absorbent towels, scrub brushes, trash bags, and sponges so you can move quickly from water removal to sanitizing.
Choose cleaning products that kill bacteria, lift grime, and won’t damage finished surfaces. Keep gloves, masks, and boots nearby so you stay protected while you work.
- Fresh towels help you feel in control.
- Heavy-duty bags keep contamination contained.
- A stiff brush lets you reclaim each room.
Set supplies in one labeled bin near the flood zone, then follow your recovery techniques in order: clear debris, wash hard surfaces, rinse, and dry.
You’re not working alone; every prepared step brings your home closer to safe, usable, and clean again.
Pump Out Standing Water
Choose a pump rated for the amount of water you need to remove, and match it to the depth and debris level in the flooded area.
Set the pump on a stable surface, keep the intake clear, and route the discharge hose to a safe drainage point.
Watch the water level as it drops, and stop the pump before it runs dry to prevent damage.
Choose Right Pump
If standing water remains in your flooded house, you need a pump that matches the depth and volume of the water you’re removing.
Choose among pump types based on how fast you need water flow and how much debris the water carries. A submersible pump handles deeper water and boosts pump efficiency, while a sump pump can help with lighter flooding and smaller spaces.
Check pump capacity so you don’t waste time waiting. Good pump maintenance keeps the unit working when your team needs it most.
- You cut stress when the right tool fits the job.
- You protect your space from more damage.
- You move forward with confidence.
Set pump placement near the lowest point, then monitor performance and adjust as needed.
Place Pump Safely
With the right pump selected, place it on stable ground or a secure platform at the lowest practical point in the flooded area. Keep the unit upright and clear of debris so your pump placement stays secure while water shifts.
If the floor is uneven, shim the base with solid boards or bricks that won’t sink. Route the discharge hose toward a safe outlet, and make sure it won’t kink or whip during pump operation.
Keep electrical connections dry and elevated, and use a GFCI-protected source whenever possible. Leave enough space around the pump for ventilation and easy handling.
Work like a team: check that everyone stays clear of the setup, and don’t move the pump once it’s running unless you’ve shut it down first.
Monitor Water Removal
Keep watch on the pump and the water level as the area drains. You’ll protect the space by checking hose position, power, and discharge flow every few minutes.
Use monitoring techniques like marking the wall with tape, logging water levels, and listening for changes in pump pitch. If the pump slows, stops, or sounds strained, shut it down and clear the intake before restarting.
- Feel the relief of steady progress.
- Notice the confidence that comes from control.
- Stay connected to the team by sharing updates fast.
Keep the floor clear, and don’t let water rise back toward outlets or appliances. When the level drops, move the pump to the lowest remaining pocket and repeat.
Careful monitoring helps you finish safely, together.
Use a Wet Vac for Small Flooded Areas
For small pockets of standing water, grab a wet vac and start at the lowest point of the affected area. Check that the tank, hose, and filter suit liquid pickup, then plug into a grounded outlet or use a battery unit.
Move slowly, keep the nozzle flat, and empty the tank before it reaches full capacity so suction stays strong. This approach gives you clear wet vac benefits: faster removal, less strain, and better cleanup efficiency.
Work in short passes, overlapping each path so you don’t leave behind hidden water. If you’re helping a neighbor or family member, coordinate turns and keep the area safe and steady.
Wipe the nozzle between passes, and repeat until the surface feels dry and ready.
Remove Carpet, Padding, and Debris
Lift the carpet, padding, and any loose debris as soon as you can so moisture doesn’t keep spreading into the subfloor.
You should cut the carpet into manageable strips, roll them tightly, and move them outside for carpet disposal.
Pull the padding next; it traps water and usually can’t be saved, so plan for padding replacement.
Use gloves and a mask, and place nails, staples, and broken trim in sturdy bags.
Work room by room so you and your helpers stay organized.
- Protect your feet and hands.
- Keep walkways clear for your team.
- Toss saturated debris quickly.
After removal, inspect the floor for damage and keep your group focused on safe, steady progress.
Dry Walls, Floors, and Hidden Spaces
Now that the carpet, padding, and debris are out, start drying every exposed surface right away to limit rot and mold.
Open windows if weather allows, run fans to move air across walls and floors, and use a dehumidifier to pull moisture from the room.
Aim airflow at baseboards, wall cavities, and corners where hidden moisture can stay trapped.
Remove wet trim only if it helps you expose damp framing.
Check drywall, subfloors, and lower studs with a moisture meter, and keep using drying techniques until readings drop to normal.
Don’t close the space back up too soon; trapped dampness can spread damage.
Work methodically, and you’ll protect your home and help your crew recover together.
Sanitize Surfaces After Water Removal
Once standing water is gone and surfaces are visibly dry, sanitize hard, nonporous areas to reduce bacteria, mold spores, and other contaminants left behind by floodwater.
Mix and apply a disinfectant labeled for flood cleanup, following the contact time exactly; that’s how you get effective cleaning without missing hidden residue. Wipe from cleanest to dirtiest areas and change cloths often.
- Protect your family by sanitizing surfaces now.
- Restore control with each careful pass.
- Rebuild together in a safer home.
Rinse food-contact surfaces after disinfecting if the label requires it, then let everything air-dry fully.
Wear gloves, keep windows open, and discard disposable wipes and sponges after use. If a surface can’t be cleaned well, replace it so your home feels ready again.
Watch for Mold After Cleanup
Even after you’ve sanitized hard surfaces, keep watching the area for mold because hidden moisture can still trigger growth behind walls, under flooring, and inside insulation.
Check daily for musty odors, discoloration, peeling paint, warped materials, and visible spots; these are common mold growth signs. If humidity stays above 60%, use fans, dehumidifiers, and open vents to dry the space fast.
Remove wet drywall, insulation, and carpet padding if they can’t fully dry within 24 to 48 hours. Record any changes and mark problem areas so you can act quickly.
Follow mold prevention strategies by sealing leaks, improving airflow, and cleaning damp surfaces promptly. You’re not alone in this cleanup—steady monitoring helps your home stay safe, dry, and ready for recovery.
Frequently Asked Questions
How Soon Should Insurance Be Notified After a House Flood?
Notify your insurer immediately, ideally within 24 hours, because flood insurance timelines are strict and immediate notification importance helps you document damage, start claims fast, and protect your coverage while you’re still managing recovery.
Can Floodwater Be Safely Reused for Any Household Purpose?
No—you can’t safely reuse floodwater for most household tasks. You’ll need floodwater filtration, then lab-grade testing, before any safe repurposing. Without that, you’re inviting contamination, corrosion, and chaos into your home.
When Should Professionals Replace Damaged Drywall Instead of Drying It?
You should replace damaged drywall when moisture detection shows saturation beyond the baseboard, swelling, crumbling, or mold growth. During drywall assessment, you’ll save time and prevent hidden damage by hiring professionals for wet insulation, contaminated water, or structural compromise.
What Health Symptoms Suggest Hidden Contamination After Flooding?
Coughing, wheezing, fever, headaches, or skin rashes can signal hidden contamination after flooding. Since mold growth can start within 24–48 hours, you should act fast, watch for respiratory issues, and call professionals.
How Long Does Flood Cleanup Usually Take for a Typical Home?
Typically, you’ll need 3–14 days for cleanup duration, depending on damage and drying speed. You’ll follow a restoration timeline that includes water removal, drying, sanitizing, and repairs. Act quickly, and you’ll reduce delays considerably.
Review
After you’ve stopped the source, drained the standing water, and cleared the damaged materials, you’re not done—you’re shifting from rescue to recovery. A flooded house can look dry on the surface yet still hide moisture in walls, floors, and cavities. Keep using fans, dehumidifiers, and sanitizers, and inspect for mold often. Swift action can save structure, but careful follow-through protects health. That contrast matters: fast removal first, thorough drying next.