
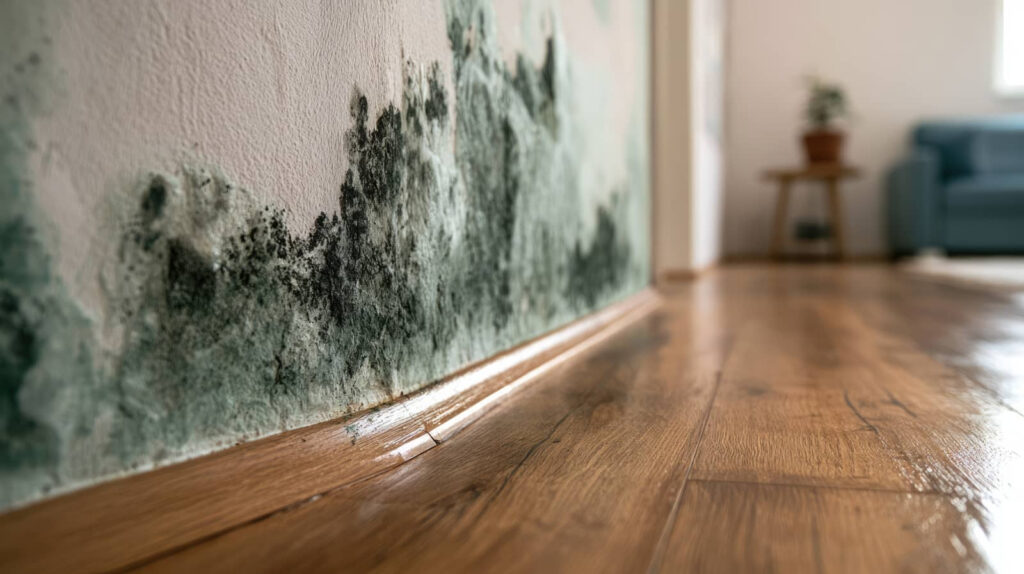
Water damage starts hidden behind walls or under floors, so you can’t trust what looks dry. You need a moisture inspection to check for active leaks, map trapped water, and measure readings in drywall, framing, and flooring. With thermal imaging and meter data, you’ll see where damage spreads, how mold risk builds, and when drying isn’t enough. The next step can change the outcome.
Key Takeaways
- Check for active water intrusion and trace moisture outward from the source, including plumbing, roofing, windows, and appliances.
- Use moisture meters and thermal imaging to map hidden dampness and compare readings against nearby dry areas.
- Inspect common concealed areas like wall cavities, under sinks, behind baseboards, and beneath fixtures for trapped moisture.
- Watch for stains, musty odors, warped flooring, spongy drywall, and other signs that indicate moisture damage and mold risk.
- Document readings, photograph affected areas, remove standing water, and seek professional help if saturation is widespread or hidden.
What Moisture Inspection Checks First?
First, a moisture inspection checks for active water intrusion and the highest-concentration areas of moisture, usually by starting at the visible source and tracing spread patterns outward and downward.
You then verify nearby moisture sources, including plumbing, roofing, windows, appliances, and damp structural materials. This first pass helps you separate fresh damage from older staining, so you can focus on what’s still wet and what’s already drying.
You also document the affected rooms, materials, and boundaries to support a consistent cleanup plan. Your inspection frequency should match the severity of the event, because repeated checks reveal whether conditions are improving or worsening.
How Moisture Inspection Tools Find Hidden Water
Once you’ve identified the wettest areas, moisture inspection tools help you locate water that isn’t visible on the surface. You use thermal imaging to compare temperature patterns, and cooler zones often signal trapped moisture.
Then you verify those readings with moisture meters, which measure material dampness directly and help you separate true saturation from surface condensation. By moving methodically across walls, floors, and trim, you build a clear map of affected zones.
This process lets you confirm hidden water without unnecessary cutting or guesswork. You also gain confidence because each reading supports the next, creating a shared, consistent picture of damage.
When you combine these tools, you inspect with precision, protect your property, and stay in control of the restoration process.
Where Water Damage Hides in Your Home
Water damage often hides in places you don’t see right away, especially where materials meet or where airflow is limited. In your home, hidden leaks can move behind finishes and settle into moisture traps that slow drying and raise risk.
You should check:
- Wall cavities around plumbing runs
- Under sinks, tubs, and appliance bases
- Behind baseboards, cabinets, and trim
These zones usually trap water after a leak or overflow, and you may feel more confident once you map them methodically.
Pay close attention to seams, corners, and penetrations because they concentrate moisture. If you inspect each layer in sequence, you’ll better understand where water traveled and where it can persist.
That approach helps you protect your space and keep your home’s structure working for you.
Signs You Need a Moisture Inspection Now
If you see visible water stains, smell musty odors, or notice warped flooring, you need a moisture inspection now.
These conditions often indicate trapped moisture behind surfaces or beneath finishes, where damage can continue unnoticed.
You should assess the affected areas promptly to identify the source and limit further deterioration.
Visible Water Stains
Visible stains on ceilings, walls, or floors often signal that moisture has already migrated beyond the surface, so you should schedule a moisture inspection as soon as you notice discoloration. You’re protecting your space and your people when you act quickly.
Inspect the area for:
- ring-shaped halos or spreading edges
- bubbling paint, warped drywall, or softened trim
- repeated spots after cleaning
These water stain causes often include plumbing leaks, roof intrusion, condensation, or past flooding.
Don’t rely on stain removal alone; if the mark returns, hidden moisture may still remain in framing or insulation. A qualified inspection helps you locate the source, measure saturation, and confirm whether materials need drying or replacement.
That step keeps your home safer, your repair plan clearer, and your team informed.
Musty Odors
Musty odors often point to hidden moisture, even when surfaces look dry, so you should schedule a moisture inspection right away.
You may notice musty smells in closets, baseboards, HVAC returns, or near damp materials. These odors usually mean microbial growth is active, and you shouldn’t ignore them.
During inspection, a technician can trace odor sources with moisture meters, thermal imaging, and targeted sampling. This method helps you identify affected areas before the damage spreads.
If you live in a shared building or family home, quick action protects everyone’s comfort and health.
When you act early, you join the group of owners who prevent larger repairs, reduce contamination risk, and restore a safe indoor environment with confidence.
Warped Flooring
Warped flooring is another clear sign you need a moisture inspection now, especially after water damage has soaked subfloors or framing.
You may notice cupping, crowning, or buckling, and each pattern points to trapped moisture migrating through your flooring types.
Check for:
- Raised seams or edges
- Soft spots underfoot
- Gaps that widen over time
If you see these changes, stop normal use and document the affected area.
Then schedule a moisture inspection to measure surface and hidden dampness.
You’ll get clear data for repair options, whether you need drying, section replacement, or full-floor removal.
Acting quickly helps you protect your home and stay with the group of owners who catch damage early and keep restoration costs controlled.
How Moisture Readings Reveal Hidden Damage
You can map hidden moisture by taking systematic readings across walls, floors, and cavities, then comparing each value against adjacent dry reference points.
When you see localized spikes, you can identify likely water pathways, trapped saturation, or concealed material breakdown.
Those patterns help you target inspection areas before damage spreads or becomes visible.
Hidden Moisture Mapping
Where’s the water still hiding after the visible damage dries out? You map hidden moisture by taking calibrated readings across walls, floors, and trim, then comparing each point to a dry baseline. This method helps you locate hidden sources and zones of moisture retention before they spread. You can trust the data because it shows where materials still hold water, even when surfaces look stable.
Check seams, corners, and cavities.
Record readings in a grid.
Mark anomalies for follow-up.
When you work this way, you join a methodical team that treats every reading as evidence. That shared discipline lets you trace concealed dampness with confidence, limit uncertainty, and plan focused drying where it matters most.
Reading Spike Patterns
Spike patterns show up when readings jump sharply from one point to the next, and those jumps often point to concealed water paths behind finishes, inside cavities, or under flooring.
You should compare adjacent measurements on the same surface and across materials, because true moisture anomalies rarely appear alone.
Use spike analysis to confirm whether a high reading is isolated, linear, or clustered near seams, baseboards, or penetrations.
With careful pattern recognition, you’ll separate surface condensation from damage that’s migrated deeper.
Document each point, note the gradient, and retest after controlled drying so you can verify whether the spike drops or persists.
When you work methodically, you join the technicians who catch hidden damage early and protect the structure, the repair plan, and the people relying on it.
What Water Damage Does to Drywall and Floors
When water enters drywall and flooring assemblies, it quickly weakens both structural and finish materials. You’ll notice drywall deterioration as gypsum softens, paper faces swell, and fasteners lose grip.
In floors, moisture changes wood and substrate dimensions, driving floor buckling and edge lift.
- You may see discoloration, seam opening, or surface blistering.
- You can feel spongy drywall, warped trim, or uneven flooring underfoot.
- You should document affected areas to guide drying and repair planning.
These changes don’t stay isolated; they alter load paths, reduce attachment strength, and compromise fit at joints.
When you inspect, compare clean, dry sections with affected ones so you can tell what’s changed. That method helps you act quickly and stay aligned with your restoration team.
How Moisture Inspection Reveals Mold Risk
Moisture inspection also helps you identify mold risk before visible growth appears. You check walls, floors, and hidden cavities for elevated readings, damp odors, and temperature differences that signal trapped water.
When levels stay above baseline, mold growth can begin within 24 to 48 hours, so you need a disciplined inspection frequency after any leak or flood. Use a calibrated meter, then map wet zones and compare them to dry areas.
Pay attention to recurring moisture at seams, baseboards, and behind cabinets, because those patterns show where spores may thrive. By documenting each reading, you join a practical, informed approach that keeps your home safer, your team aligned, and your next steps clear.
When Moisture Inspection Calls for Restoration Help
If your inspection shows widespread saturation, hidden cavity moisture, or readings that stay elevated after drying, you should bring in restoration help. You’re likely dealing with conditions that exceed basic drying and need controlled mitigation.
A qualified team can verify the inspection process, map affected materials, and set a realistic restoration timeline.
- Persistent moisture in framing, subfloors, or insulation
- Swelling, delamination, or softening in building materials
- Odor or meter readings that don’t match surface dryness
When you see these signs, you’re not overreacting; you’re protecting your home and joining a response that follows technical standards.
Restoration crews use targeted extraction, dehumidification, and documentation to reduce uncertainty. Their method helps you move from inspection to recovery with confidence.
What To Do After The Moisture Inspection?
Once the moisture inspection is complete, you should compare the readings, identify every affected area, and separate what needs drying from what needs repair.
Next, you’ll document the data, photograph each zone, and label materials so your team stays aligned.
Begin moisture management immediately by removing standing water, increasing airflow, and running dehumidifiers until readings return to acceptable levels.
Then, isolate saturated drywall, insulation, and flooring, because delay can spread damage.
If structural components remain compromised, schedule restoration techniques that match the material and severity.
You should verify progress with repeat measurements, not guesswork.
Clear communication keeps everyone informed and helps you act as part of a coordinated recovery effort.
When you follow this method, you protect the space, reduce risk, and move forward with confidence.
Frequently Asked Questions
How Long Does a Moisture Inspection Usually Take?
Usually, you’ll spend 30 to 90 minutes on a moisture inspection, depending on size and severity. You’ll see moisture detection techniques and inspection equipment types guide the process, keeping findings precise, methodical, and clear.
Do I Need to Leave My Home During the Inspection?
Usually, you don’t need to leave your home during the inspection. You can stay nearby while the technician checks moisture levels, supporting home safety and inspection benefits while keeping you informed and included.
Can Insurance Cover the Cost of Moisture Inspection?
Yes, insurance can cover moisture inspection costs when you file insurance claims for covered water damage. You’ll need policy approval, documented loss, and a qualified inspector. Check exclusions, deductibles, and claim limits carefully.
Will the Inspection Require Opening Walls or Floors?
You may need to open walls or floors if inspection techniques show hidden moisture; inspectors’ll often use noninvasive tools first. If wall damage appears likely, they’ll access select areas to verify drying and locate trapped water.
How Often Should a Home Be Inspected After Water Damage?
Initially, you should inspect your home weekly, then monthly after repairs. During each post repair evaluation, keep ongoing maintenance checks consistent, because a stitch in time saves nine, and you’ll protect your home’s community.
Conclusion
After a moisture inspection, you can see the damage map more clearly, like a hidden stain spreading under a painted wall. You’ll know where water still lingers, where drywall is soft, and where floors may be swelling. Use the findings to dry the space fast, improve airflow, and monitor readings until they drop. If moisture stays high or mold risk rises, you’ll need restoration help before the damage deepens further.