
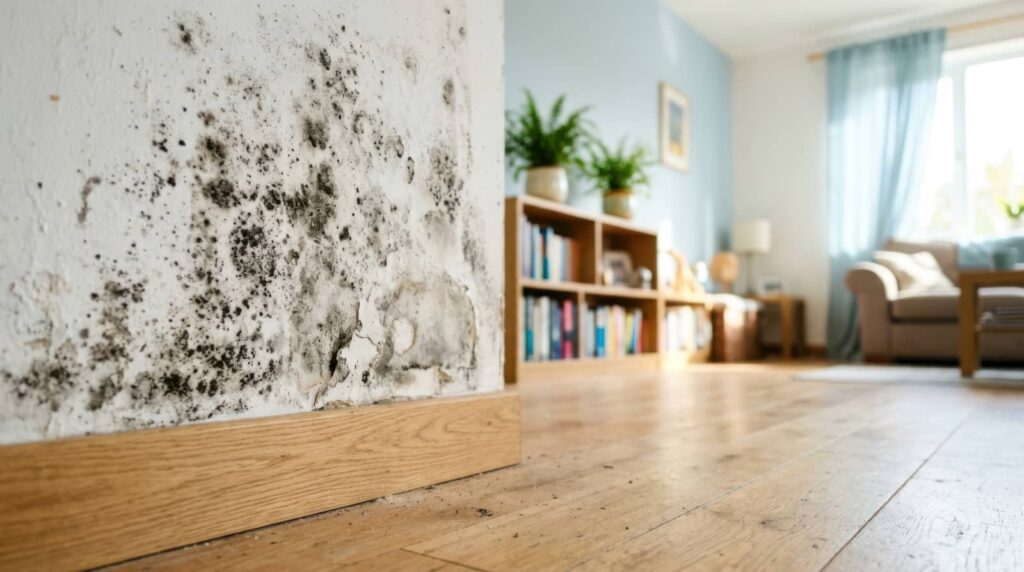
After emergency flood cleanup, you need to assess moisture, inspect hidden cavities, and isolate contaminated areas before repairs begin. Remove water-damaged materials that can’t be salvaged, then dry the structure and control humidity to limit spore spread. You should clean and disinfect all affected surfaces, verify moisture levels, and confirm air quality. The next step determines whether the property is truly safe for occupancy.
Key Takeaways
- Stop moisture sources, shut off HVAC, remove standing water, and document all flood damage before starting remediation.
- Inspect hidden areas like walls and crawlspaces for moisture, mold, and odors using calibrated moisture meters and visual checks.
- Contain affected zones with barriers and negative pressure, restricting entry to authorized personnel during cleanup.
- Remove unsalvageable porous materials, then clean and disinfect hard surfaces with detergent and EPA-registered products.
- Dry thoroughly, maintain indoor humidity below 60%, repair leaks, and verify conditions before reopening occupied areas.
Flood Mold Cleanup: What to Do First
Before you begin flood mold cleanup, stop all sources of moisture, shut off affected HVAC systems if contamination may spread, and document the damage for insurance and compliance records.
You then establish an emergency response zone, restrict access, and wear required PPE to protect your team and occupants.
Remove standing water and saturated materials promptly, following local disposal rules and manufacturer guidance.
Keep humidity controlled and maintain ventilation only if it won’t distribute spores.
Use mold prevention tips: dry the area within 24 to 48 hours, verify surface dryness, and clean nonporous materials with approved agents.
Coordinate with licensed professionals when damage exceeds your crew’s scope.
Inspect Hidden Places for Mold
You must inspect behind walls for concealed moisture, staining, and microbial growth after flood cleanup.
Check the crawlspace for standing water, damp insulation, and mold on structural members.
If you detect suspect conditions, document them and initiate remediation without delay.
Behind Walls Inspection
A thorough behind-walls inspection can reveal hidden mold growth that surface cleaning won’t catch after flood cleanup. You should use mold detection techniques and perform wall cavity assessment to verify moisture intrusion, staining, and microbial colonization.
Remove small access points where permitted, then inspect insulation, framing, and sheathing with a flashlight, borescope, or moisture meter. You’re part of a team that values documented compliance, so record findings and flag any affected materials for removal.
- Check for damp odors and discoloration.
- Measure moisture levels before reopening finishes.
- Confirm dry, clean cavities before restoration.
If you find active growth, isolate the area and follow your remediation protocol. This keeps your work aligned, protects occupants, and supports a safe return to service.
Crawlspace Mold Check
Crawlspaces often hide mold growth after flood cleanup, so inspect them early and document every finding. You should enter only when conditions are safe, using PPE, lighting, and a moisture meter.
Check joists, sill plates, insulation, ducts, and soil cover for staining, odor, and visible mold growth. Verify crawlspace ventilation openings aren’t blocked and that standing water, wet debris, or damaged vapor barriers are addressed.
If you detect elevated humidity, you’ll need dehumidification and source control before cleanup proceeds. Photograph each affected area, label samples if required, and track dates, locations, and measurements for compliance.
You’re protecting the whole team when you report findings promptly and coordinate repairs with qualified professionals.
Seal Off Moldy Areas Before Repairs
Before repairs, you must seal off all mold-affected areas with physical barriers and isolate adjacent spaces.
This containment limits access and helps prevent airborne spores from spreading during disturbance.
Use controlled entry and negative-pressure measures where required by code or project specifications.
Contain Affected Zones
Containment is the first barrier against mold spread, so you should isolate all affected zones before any demolition or repair work begins. Use proven mold containment strategies and zone isolation techniques to define the work area, protect adjacent rooms, and keep your team aligned on protocol.
- Close access points with sealed barriers.
- Mark the perimeter and restrict entry to authorized personnel.
- Verify the zone stays isolated during cleanup and repair.
You should document each boundary, inspect closures, and correct gaps immediately. This keeps your site compliant, organized, and ready for the next remediation step.
When you control the area tightly, you support your crew, reduce confusion, and help everyone work with confidence.
Prevent Airborne Spread
Once you’ve isolated the work zone, seal off moldy areas to prevent spores from becoming airborne during repairs. You should use 6-mil polyethylene, taped seams, and temporary barriers to separate contaminated surfaces from clean spaces.
Close HVAC registers, block returns, and maintain negative pressure with HEPA-filtered exhaust when required by your protocol. You’ll protect air quality and reduce cross-contamination for everyone working nearby.
Wear PPE before entry, and verify that access points stay closed during demolition. Don’t dry-sweep or disturb debris without capture. Support moisture control by fixing leaks, removing wet materials, and keeping relative humidity within limits.
Inspect the enclosure daily, and replace damaged barriers at once. When you follow these controls, you help your team work safely and keep remediation compliant.
Remove Water-Damaged Materials Safely
Remove and discard water-damaged porous materials that can’t be fully cleaned and dried, including carpet padding, drywall, insulation, ceiling tiles, and upholstered items.
You protect your team by separating salvageable items from contaminated waste. Use damage assessment strategies to confirm what stays and what goes.
Apply water extraction techniques first, then cut, bag, and remove materials in sealed plastic. Wear gloves, eye protection, and an N95 or better respirator when conditions warrant.
Follow these steps:
- Isolate the work area.
- Remove debris without tearing.
- Dispose of waste per local rules.
You belong in a disciplined cleanup crew when you document removal, label contents, and keep pathways clear.
Avoid compressing waste bags or reusing saturated materials. Don’t leave porous items in place once you’ve decided they’re unsalvageable.
Dry the Structure and Lower Humidity
Get the structure dry fast to limit mold growth and secondary damage. You should run dehumidifier usage continuously in enclosed rooms, empty condensate safely, and verify that units are sized for the space.
Pair this with ventilation strategies that exchange damp indoor air with drier outdoor air when weather permits. Open windows, use exhaust fans, and keep interior doors ajar to improve airflow across walls, floors, and cavities.
Monitor relative humidity with a hygrometer and target 30% to 60%. If levels stay high, add more equipment and isolate wet zones. Keep supply and return pathways unobstructed, and document readings so your team stays aligned.
Drying isn’t optional; it’s a critical control step that protects your property and helps your crew work with confidence.
Remediate Mold in Affected Areas
Contain and remove visible mold from all affected materials using approved remediation methods and appropriate personal protective equipment. You’ll identify mold types before work starts, because species and extent guide your remediation techniques and help you protect your team.
Isolate contaminated areas, limit dust, and remove porous materials that can’t be restored. Use only trained personnel, and document each action for compliance and traceability.
Inspect all affected zones for active growth and hidden spread.
Apply remediation techniques matched to material condition and contamination level.
Verify complete removal before reopening the area to occupants.
You belong in a controlled, code-aware process where you follow procedure, reduce exposure, and restore safe conditions.
Keep records, coordinate with qualified supervisors, and stop if conditions exceed your plan or local regulatory limits.
Clean and Disinfect Flood-Damaged Surfaces
After you’ve removed visible mold and cleared contaminated materials, clean all flood-damaged hard surfaces with detergent and water. Then apply an EPA-registered disinfectant or other approved sanitizing agent as required by local code and the material type.
You should follow the label contact time, dilution rate, and surface compatibility limits exactly. Use clean cloths, mops, and buckets, and replace them when they’re contaminated.
For porous items you’re keeping, verify that the manufacturer allows wet cleaning and sanitizing. Document each step so your team stays aligned with required disinfecting techniques.
Treat reusable tools, fixtures, and hardware the same way before reinstalling them. These mold prevention strategies help you reduce residual contamination and support compliant restoration work.
Work methodically, and you’ll protect occupants, respect code requirements, and keep the space ready for safe reentry.
Check Moisture and Air Quality
Confirm that moisture levels have returned to acceptable limits before you close out remediation, using a calibrated moisture meter to verify framing, subfloors, drywall, and other hidden cavities.
Keep moisture monitoring documented, and compare readings to dry standard conditions for the structure. If any component stays elevated, continue drying until it meets criteria.
Check air quality after cleaning and drying, especially in enclosed rooms and supply paths. Use visual inspection and, when required, professional sampling to confirm no lingering odor, dust, or particulate issues.
- Measure concealed materials.
- Record moisture monitoring results.
- Verify air quality before turnover.
You’re protecting your team and occupants by closing only when both moisture and air quality are within acceptable limits.
Prevent Mold After Future Flooding
Once remediation is complete and the structure is dry, reduce the chance of repeat mold growth by controlling future water intrusion and response time.
You should inspect roofing, flashing, gutters, grading, and foundation joints after every storm. Seal leaks immediately, document repairs, and keep sump pumps tested.
Use dehumidifiers and HVAC settings that support humidity control, especially in basements and crawlspaces. Keep indoor relative humidity below 60%.
After any new flooding, remove wet materials within 24 to 48 hours, dry hidden cavities, and verify conditions with meters.
Follow posted mold prevention tips: store contents off the floor, isolate porous items, and maintain clear access to shutoffs.
Frequently Asked Questions
How Long Should Mold Remediation Take After Flood Cleanup?
You should expect mold remediation to take 1–7 days after flood cleanup, depending on extent, materials, and drying. The remediation process must start within 24–48 hours to control the mold growth timeline and protect occupants.
Can I Stay Home During Mold Remediation?
You can stay home during remediation only if containment, ventilation, and negative-pressure controls protect your home environment; otherwise, you shouldn’t. Follow safety precautions, keep out of affected rooms, and verify clearance before reoccupying.
Will Insurance Cover Flood-Related Mold Removal Costs?
Maybe, depending on your insurance policies and coverage limits. You’ll need to review exclusions, flood endorsements, and documentation requirements. If you’re covered, you can claim eligible mold removal costs after the flood event.
Do Air Purifiers Help After Emergency Flood Mold Cleanup?
Yes, air purifiers can help by trapping lingering spores and odors, improving air quality after cleanup. You’ll still need drying, HEPA filtration, and source control to limit health effects and meet remediation standards.
When Is Professional Mold Testing Necessary After Flooding?
You need professional mold testing after flooding when you see visible mold growth, persistent odors, or health complaints, or when insurance, rental, or remediation rules require documented testing methods for clearance and compliance.
Wrap-Up
After emergency flood cleanup, you should treat mold remediation as a critical control step, not a finish line. In one facility, 48 hours of delayed drying turned a minor leak into a full containment job, like a small crack in a levee becoming a breach. You need to inspect hidden spaces, remove damaged materials, disinfect surfaces, and verify moisture levels before reoccupancy. If you stay disciplined, you’ll reduce recurrence and protect occupants.