
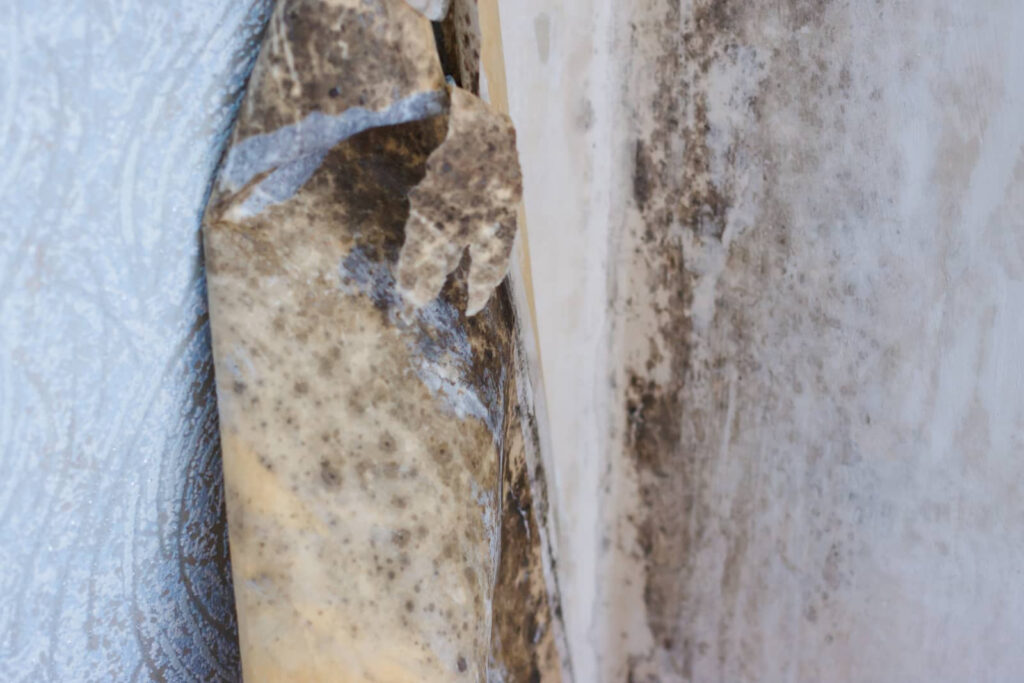
After water damage, you need to inspect more than the obvious wet spots. Check walls, floors, trim, and ceilings for staining, swelling, and soft areas, then use a moisture meter to compare damaged and dry sections. Thermal imaging can reveal hidden moisture in cavities, and mold may appear if drying stalls. The real issue is knowing when the materials are truly dry, and that takes more than a quick look.
Key Takeaways
- Check for visible signs like dampness, staining, swelling, peeling paint, or a glossy sheen on walls, floors, trim, and cabinets.
- Use a moisture meter on affected and unaffected areas to compare readings and identify wet zones.
- Inspect floors, baseboards, seams, thresholds, and corners for soft spots, separation, or hidden pooled water.
- Look for trapped moisture in wall cavities, insulation, and behind furniture using thermal imaging or access-point probing.
- Monitor readings daily until dry, and call restoration professionals if moisture stays elevated or mold appears.
Check for Visible Moisture
Start by visually inspecting all affected surfaces for obvious signs of moisture, such as damp drywall, pooled water, staining, swelling, or a glossy sheen on materials that should be dry.
You should scan baseboards, trim, ceilings, floors, and the backs of cabinets for visible signs that water’s still present. Check corners, seams, and penetrations where moisture sources often travel or collect.
If you see discoloration, peeling paint, warping, or soft spots, document them immediately so your team can act together with confidence.
Use a bright flashlight to reveal subtle sheen and edge staining. Don’t disturb damaged materials yet; first confirm the extent of what you can already see.
Clear observation helps you identify active moisture sources and decide whether the area needs immediate drying or further inspection.
Measure Moisture on Walls
You should start with a surface moisture check to confirm whether the wall still holds water after visible signs have faded.
Then use a wall moisture meter to take readings at several points, including affected and unaffected areas for comparison.
Record the values so you can identify wet zones, track drying progress, and decide when further action is needed.
Surface Moisture Checks
Surface moisture checks on walls give you a fast read on whether water has lingered at the surface or penetrated deeper into the material.
You can pair visual surface inspection techniques with moisture detection tools to spot staining, swelling, peeling paint, or cool patches. Run your hand lightly across the wall and note any tacky, damp, or uneven areas.
Check seams, baseboards, corners, and around windows, where moisture often collects. Work in a systematic grid so you don’t miss small wet zones.
If the surface feels dry but looks discolored, mark it for follow-up. These checks help you and your crew build a shared picture of the damage and decide which areas need closer attention next.
Wall Meter Readings
Once you’ve identified suspect areas, use a wall moisture meter to quantify how much moisture remains in the material.
Choose from moisture meter types: pin meters for depth-specific readings and pinless meters for faster, nondestructive scans. Hold the sensor flat against the wall, then check several points around the damaged zone, including edges where moisture migrates.
Compare readings to an undamaged reference area in the same room, since normal building materials vary. If values stay elevated, you still need drying time before wall repair techniques begin.
Track numbers over time; falling readings show progress, while flat readings signal trapped moisture or hidden damage. You’re not guessing here—you’re documenting conditions so your team can make confident, shared decisions about cleanup, repair, and restoration.
Inspect Floors, Trim, and Baseboards
Start at the floor line and work outward, because moisture often hides where materials meet.
Begin floor surface inspections by checking seams, edges, and any soft or cupped spots. Press gently with your hand or a moisture meter, and note changes in texture, color, or sound.
Then move to baseboard assessments: look for swelling, paint blistering, staining, or separation from the wall. Run a dry cloth along trim to catch damp residue, and watch for coolness that suggests retained moisture.
Inspect connections at thresholds and corners, where water can pool after cleanup.
If you’re part of a team, record each finding the same way so everyone can compare results and act quickly with confidence.
Find Hidden Moisture in Cavities
You should check wall cavities for trapped moisture behind drywall, paneling, and insulation.
Use a moisture meter at access points and around penetrations to confirm elevated readings.
If the source isn’t obvious, run a thermal imaging scan to locate cooler, damp areas inside the cavity.
Wall Cavity Checks
To catch hidden moisture in a wall cavity, probe below the surface rather than relying on visible damage alone. You should remove a small section of drywall or use existing access points, then inspect the framing, wall insulation, and sheathing for dampness, staining, or softened fibers.
Use a calibrated moisture meter to compare suspect areas with a dry reference spot nearby. Check around outlets, baseboards, and plumbing penetrations, where water often migrates first. If the cavity feels cool and musty, note whether cavity ventilation is limited, since trapped humidity can slow drying.
Document readings and mark wet zones so your team can target cleanup accurately. When you work methodically, you protect the structure and help everyone stay confident that the wall is truly drying.
Thermal Imaging Scans
Thermal imaging helps you spot temperature patterns that often reveal hidden moisture in wall and ceiling cavities. You scan slowly, compare surfaces, and look for cool streaks, irregular patches, or sharp edges that suggest wet insulation, trapped water, or air leakage.
The thermal imaging benefits include fast coverage, noninvasive inspection, and better targeting before you open any cavity.
- A cold outline around a ceiling stain
- A damp band behind drywall
- A cooler baseboard after a leak
Use the camera with a moisture meter, because thermal imaging limitations include false readings from sunlight, drafts, and recent HVAC use.
When you document each anomaly, you help your team act with confidence and stay aligned on the next repair step.
Look for Mold After Water Damage
After water damage, inspect hidden and visible surfaces for mold growth, because damp materials can begin supporting spores within 24 to 48 hours.
Check baseboards, drywall seams, carpet edges, insulation, and behind furniture for discoloration, fuzzy patches, or a musty odor. If you spot growth, document the area and isolate it to protect your household.
You’ll support mold prevention by drying affected materials quickly, removing saturated porous items, and keeping indoor humidity low. Use gloves and a mask when you handle contaminated surfaces.
For larger or recurring colonies, schedule professional mold remediation so your space stays safe and your recovery plan stays on track.
Stay alert, act fast, and you’ll help your home feel secure again for everyone inside.
Measure Moisture in Ceilings and Attics
Use a moisture meter at suspect ceiling joints, around light fixtures, and along attic framing to map wet areas.
Check attic insulation for clumping, compression, or dark staining, since those signs often show hidden moisture migration.
Watch for ceiling leak indicators like discoloration, sagging, and peeling paint, and verify each one against your meter readings.
Moisture Meter Placement
When you inspect ceilings and attics for water damage, place the moisture meter on the most likely wet zones first, such as stained drywall, sagging plaster, roof sheathing, framing near penetrations, and insulation around leaks.
Choose among moisture meter types—pin, pinless, or dual-mode—based on access and material, then confirm proper calibration before every reading. Hold the sensor flat, apply steady pressure, and compare suspect spots with dry reference areas nearby.
- Trace the beam across a dark ceiling ring.
- Probe rafters beside a vent pipe.
- Map readings along a roof deck seam.
You’ll spot patterns faster when you work methodically and trust your crew’s shared checklist. Record each value, note location, and repeat questionable readings to verify the moisture plume’s edge.
Attic Insulation Checks
In attic insulation, you’ll need to test both the surface and the hidden layers, since wet batts, blown-in cellulose, and fiberglass can hold moisture long after the ceiling below looks dry.
Start by lifting a small section and probing deeper with a moisture meter at several points. Compare readings across insulation types so you can spot trapped dampness, not just cool air or condensation.
Check attic ventilation too; blocked soffits, weak exhaust, or stagnant air can keep materials from drying. If readings stay elevated, mark the area and recheck after airflow improves.
You’re part of a careful repair process, so document each measurement and note which insulation types absorb water fastest.
Remove and replace saturated material only when needed, and keep surrounding framing dry.
Ceiling Leak Indicators
Ceiling stains often tell the first story of hidden moisture, but you can’t trust appearance alone. You should inspect the ceiling below the attic with a moisture meter and a bright light, then compare readings across dry and suspect areas.
Look for water discoloration around seams, fasteners, and vents, since leaks often spread along framing before they show as damage.
- Yellow-brown rings that widen after rainfall
- Soft drywall that sags when you press it
- Paint bubbling near light fixtures
If you find ceiling stains, trace the source upward, check insulation for dampness, and verify roof penetration points.
You’re not alone in this process; careful testing helps you protect your space, confirm the problem, and plan repairs before mold or structural damage grows.
Dry Wet Materials Before Repairs
Before you repair anything, dry every wet material to reduce the risk of hidden damage, warping, and mold growth.
Match drying techniques to material types: remove surface water from tile, metal, and plastic with towels, then use fans and dehumidifiers to drive moisture from drywall, framing, and flooring.
Open cabinets, lift carpet edges, and separate stacked items so air can circulate.
Take out soaked insulation, baseboards, and padding if they can’t dry quickly.
Work methodically, and wear gloves and a respirator when needed.
You’re not just cleaning up; you’re protecting your space and helping everyone in it stay safe.
If a material stays swollen, soft, or damp, treat it as compromised and replace it before you rebuild.
Keep Checking Until Moisture Returns to Normal
Once the wet materials are dry, keep checking them until moisture readings return to normal for the material and the room. You’ll want to log each reading at the same spots and time each day so you can spot slow changes.
Compare values to moisture thresholds for drywall, wood, and flooring, not just to feel or look. If a reading stays high, repeat your drying techniques and recheck after the same interval.
- A meter pressed against a baseboard
- A clean, dry wall corner under sunlight
- A floor seam beside a still-cool cabinet
When you track steady declines, you know the structure’s drying evenly. Your attention helps the whole space feel safe, familiar, and ready for normal use again.
When to Call Water Damage Restoration Pros
If moisture readings stay elevated after repeated drying, or you see warped framing, spreading stains, mold growth, or a damp subfloor, call a water damage restoration pro.
You’ve reached the point where a targeted water damage assessment can confirm hidden moisture in cavities, insulation, and structural members. A pro uses calibrated meters, thermal imaging, and controlled air movement to define the affected area and set a realistic restoration timeline.
That matters because lingering moisture can keep materials unstable even when surface readings look normal.
When you bring in a qualified team, you’re not stepping back; you’re choosing the right people to finish the job with you.
Ask for documented readings, source tracing, and a clear scope so you can track progress with confidence.
Prevent Future Water Damage
After the affected area is dry and stable, you can cut the odds of another moisture problem by addressing the source, not just the symptoms.
Inspect your roof, gutters, grading, and foundation for weak points, then seal cracks and replace damaged flashing. Keep drainage systems clear so runoff moves away from your home, and test sump pumps before storm season.
If you live with a basement, a shared responsibility mindset helps: everyone in the house should know where shutoff valves, cleanouts, and alarms are located.
- Downspouts extend past flower beds, not against the wall.
- Sump pumps cycle smoothly in a damp, concrete pit.
- Soil slopes like a shallow ramp away from the foundation.
Recheck these areas after heavy rain, because prevention works best when you stay ahead together.
Frequently Asked Questions
How Soon Should Moisture Be Checked After Water Damage?
You should check moisture immediately, ideally within hours, because inspection timing affects drying, contamination, and structural damage. Trace moisture sources fast, document readings, and start mitigation so you don’t miss hidden wet areas.
Can Humidity Affect Moisture Meter Readings?
Yes—humidity levels can skew your meter readings, especially on porous materials. You should calibrate the meter first, then compare readings in stable conditions. You’ll get more reliable results and feel confident in your assessment.
What Tools Detect Moisture Behind Walls?
You can detect hidden wall moisture with moisture meters, wall probes, infrared cameras, and hygrometers. You’ll spot damp zones, confirm readings, and target repairs faster, so you’re working with the right tools and feel confident.
How Long Does Drying Usually Take?
Usually, you’ll dry out water damage in 24–72 hours, but moisture factors can stretch it longer—watch closely as drying techniques, airflow, and material thickness decide whether you’re back to normal fast.
Are Insurance Claims Affected by Moisture Inspection Records?
Yes—your insurance claim can be affected by moisture inspection records because insurers use moisture documentation to verify loss, track mitigation, and support compliance with insurance policies. You’ll strengthen your claim by keeping clear, dated readings.
Review
You can inspect moisture after water damage by checking visible wetness, measuring walls and floors with a moisture meter, and scanning for hidden moisture in cavities. In fact, the EPA notes that mold can begin growing within 24 to 48 hours, so speed matters. Keep documenting readings until they return to normal, and don’t start repairs until materials are fully dry. If moisture keeps rising or spreads, you’ll need professional restoration help.