
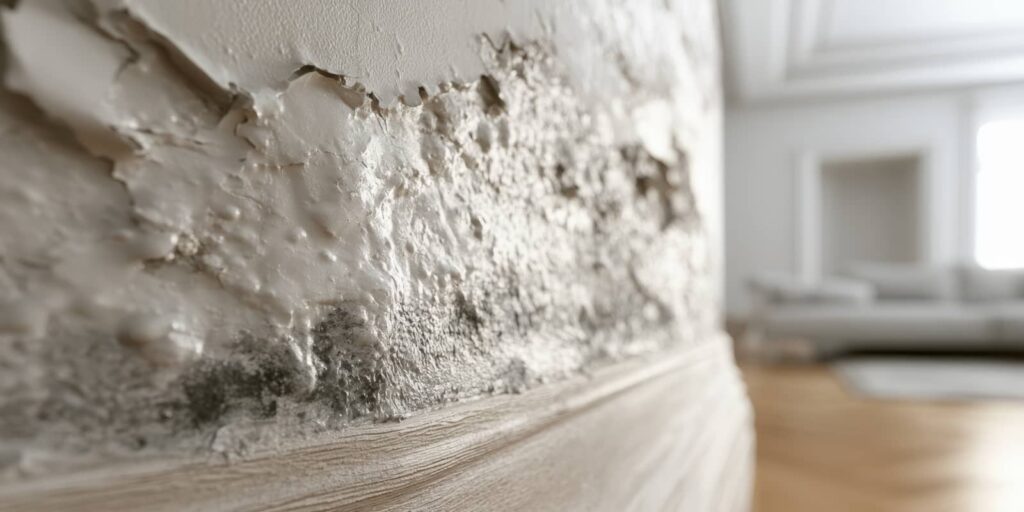
You see standing water, but the real damage often starts after it looks dry. Stop the source, inspect damp areas within 24 to 48 hours, and look for discoloration or musty odor. Remove materials that won’t dry, then dry the area with fans and dehumidifiers. Wear protective gear, check inside walls for hidden mold, and call remediation experts if contamination may have spread.
Key Takeaways
- Shut off the water source immediately and avoid standing water near electrical outlets.
- Check damp areas for mold within 24–48 hours and document any discoloration, stains, or musty odors.
- Remove wet or damaged materials that cannot fully dry, and bag debris to prevent spread.
- Dry the area quickly with fans and dehumidifiers, keeping humidity below 50%.
- Clean visible mold, repair damaged materials only after everything is fully dry, and call experts if needed.
Stop the Water Source Fast
First, shut off the water at the main valve or the nearest supply stop to prevent further flooding.
Then locate the water source and isolate it with a quick response; every minute you wait lets more moisture spread into floors, walls, and belongings.
If you can reach the fixture safely, close the valve clockwise until it stops. For a broken appliance line, turn off its dedicated shutoff and unplug the unit if needed.
If the leak comes from plumbing you can’t access, call your utility or a licensed plumber right away.
While you act, keep clear of standing water near outlets. Your fast, calm steps protect your home and help your team of responders move in with confidence.
Once the flow stops, document the damage and prepare for cleanup.
How to Check for Mold After Water Damage
Once the water is off, inspect damp areas for mold within 24 to 48 hours, since growth can start quickly on wet drywall, insulation, wood, and carpet.
Use mold detection methods like visual checks for discoloration, fuzzy patches, and water stains, plus odor checks for a musty smell. Focus on baseboards, behind furniture, under sinks, and around HVAC vents.
Follow home inspection tips by using a flashlight, looking inside closets, and checking ceiling corners and window frames.
Mark suspect spots, photograph them, and note any areas that feel soft, warped, or damp.
If you see spread beyond a small area, contact a qualified inspector so you can protect your home and stay confident with your neighbors.
Dry the Affected Area Quickly
After you’ve checked for mold, move immediately to drying the space so moisture doesn’t keep feeding growth.
Open windows only when outdoor air is drier than indoor air, and use fans to push air across damp surfaces. Pair that airflow with dehumidifier use to pull humidity below 50 percent, which helps keep your home’s air safer for everyone in it.
Focus on steady operation, not short bursts, and empty the unit before it shuts off. Follow ventilation tips by clearing furniture away from walls so air can circulate freely behind and under items.
Monitor walls, floors, and framing with a moisture meter if you have one. Drying fast reduces risk and helps your household recover together with less disruption.
Remove Wet Materials and Debris
Pull out any wet materials that can’t be fully dried, including soaked carpet, padding, drywall, insulation, ceiling tiles, and damaged baseboards.
Use material assessment to separate salvageable items from porous materials that’ll stay contaminated or warped.
Bag debris promptly, seal it, and move it out through a clean path to limit spread.
Handle each item with gloves and, if needed, eye protection.
Keep the work area organized so you and your team can work efficiently without tracking moisture or residue into dry rooms.
Follow local debris disposal rules for contaminated materials, and label loads clearly if your community requires it.
After removal, clean the exposed surfaces so drying can continue.
Clear action now helps your space recover faster and supports everyone sharing the home.
Check for Hidden Mold in Walls
Even when surfaces look dry, hidden mold can grow inside wall cavities after water damage. You need a careful wall inspection before you close anything up.
Check baseboards, outlet openings, trim seams, and drywall edges for staining, swelling, or soft spots. Use a flashlight and a moisture meter to compare affected areas with dry sections.
If you notice musty odors, bubbling paint, or discoloration, assume hidden mold may be present behind the finish. Stay systematic so you and your family can trust the repair process.
Document each finding, mark suspect areas, and keep airflow steady while you assess. If readings stay elevated, arrange professional evaluation.
A thorough wall inspection helps you catch hidden mold early and protects the structure from further deterioration.
Clean and Treat Visible Mold
Identify any moldy materials and remove or isolate them before cleaning.
Scrub visible mold with a detergent solution, using a stiff brush and controlled pressure to lift growth from the surface.
Then dry the area thoroughly with ventilation and dehumidification so moisture doesn’t remain to support regrowth.
Identify Moldy Materials
If mold has already started to grow, remove and isolate any materials that show visible contamination as soon as you can. Use mold identification techniques to inspect drywall, insulation, carpet backing, and paper goods for mold growth signs such as staining, fuzzy patches, or musty odor. You’re protecting your space and your people when you act fast.
- Bag contaminated items separately to prevent cross-contamination.
- Mark affected materials so you can track what needs disposal.
- Keep dry, clean items away from the damaged zone.
- Document each item before you move it.
Check seams, edges, and hidden cavities where moisture lingers. If a material is porous and heavily colonized, treat it as compromised.
Scrub With Detergent
Mix a detergent solution and scrub all visible mold from nonporous surfaces with a stiff brush or sponge. You should work in small sections so you can control pressure and coverage.
Rinse the tool often, and replace the solution when it looks cloudy. This step is one of the most reliable mold removal techniques for hard surfaces because detergent lifts residue and helps break the surface bond.
To improve detergent effectiveness, agitate the area until the discoloration releases, then wipe away loosened material with clean cloths. Keep your strokes firm but measured, and inspect edges, seams, and corners where mold hides.
If a stain remains, repeat the wash rather than over-scrubbing. You’re building a cleaner, safer space for everyone who belongs there.
Dry Area Thoroughly
Once you’ve scrubbed away the visible mold, dry the area completely so moisture doesn’t fuel regrowth. Use fans, dehumidifiers, and open windows to accelerate evaporation, and keep air moving until surfaces feel fully dry.
Strong ventilation techniques help you protect your space and support everyone who lives or works there. Check hidden cavities, baseboards, and insulation with a moisture meter; surface dryness alone isn’t enough.
Practice strict moisture control by fixing leaks, emptying drip pans, and monitoring humidity below 50%.
- Aim airflow across wet materials, not just the room.
- Remove damp items that can’t dry fast.
- Reinspect after 24 to 48 hours.
- Document dry readings before you rebuild or repaint.
Protect Yourself During Mold Cleanup
Before you clean mold, wear protective gear, including an N95 respirator, gloves, and goggles, to reduce direct exposure.
Open windows and use fans to improve air circulation, but don’t aim airflow directly at moldy materials.
Keep the work area isolated so you don’t spread spores into unaffected rooms.
Wear Protective Gear
When you start mold cleanup, wear the right protective gear so you don’t breathe in spores or expose your skin and eyes to contamination. Choose protective gear types that fit snugly and stay intact during work. You’re not just protecting yourself; you’re helping keep your household safer and cleaner.
Wear an N95 or higher respirator to reduce inhalation risk.
Use goggles with a tight seal to block splashes and particles.
Put on gloves and disposable coveralls to shield skin and clothing.
Remove gear carefully after cleanup to avoid spreading residue.
These steps support mold prevention techniques by limiting cross-contamination. If any item tears, gets wet, or no longer fits well, replace it before continuing.
Improve Air Circulation
After you’ve put on your protective gear, improve air circulation so you’re not working in stagnant, contaminated air. Open windows and exterior doors if weather allows, then place box fans to exhaust air outward, not deeper into the room.
Use additional fans to create directed airflow techniques that move airborne particles toward exits and away from your breathing zone. Shut off HVAC systems if they can spread spores through ducts.
If conditions permit, run a dehumidifier for humidity control and keep relative humidity below 50%. Position equipment so you’re part of a clean, organized work area, not trapped in a damp pocket.
You’ll reduce exposure, speed drying, and support a safer cleanup. Monitor airflow continuously, and adjust fan placement if dust or odors linger.
Call Mold Remediation Experts When Needed
If moisture has lingered long enough for mold to form, call a mold remediation expert right away to assess the affected area and contain the spread. You’ll get mold inspection services that identify hidden growth, moisture sources, and contamination limits.
Their professional cleanup protects your household and keeps you aligned with a proven recovery plan.
- Verify visible and hidden growth with calibrated inspection tools.
- Isolate the area to reduce spore movement through your home.
- Document findings so you can coordinate next steps confidently.
- Follow the expert’s clearance criteria before reentering the space.
When you act early, you join other informed homeowners who treat mold as a technical problem, not a guess.
That decision supports safer air, faster recovery, and fewer setbacks.
Repair Drywall, Flooring, and Insulation Safely
Inspect the drywall, flooring, and insulation to determine the full extent of water damage, including soft spots, warping, staining, and hidden moisture.
Remove any material that’s contaminated, swollen, or structurally compromised, since it can trap moisture and support mold growth.
Replace damaged sections only after the area is fully dry and you’ve confirmed the surrounding framing is sound.
Assess Damage Extent
Once the area is safe to enter, you need to determine how far the water has spread by checking drywall, flooring, and insulation for swelling, discoloration, warping, delamination, and trapped moisture.
This mold assessment and damage evaluation help you protect your crew and plan the right response. Mark affected zones, then probe seams, baseboards, and subfloors with a moisture meter.
- Check drywall for soft spots and hidden staining.
- Inspect flooring for cupping, buckling, and loosened edges.
- Test insulation for dampness and loss of integrity.
- Record readings so your team can coordinate next steps.
Stay methodical; you’re not just measuring loss, you’re building a shared, reliable plan.
When you document findings clearly, everyone on site can act with confidence and stay aligned.
Replace Contaminated Materials
Remove and replace any material that’s been contaminated beyond salvage so moisture, mold, and odors don’t spread.
You should cut drywall at least 12 inches above visible staining, then remove soaked insulation and warped flooring to expose framing. Bag debris immediately and seal it before transport.
Inspect studs, subfloor, and joists for soft spots or discoloration; if you find damage, clean and dry the area before rebuilding.
Choose mold resistant materials for replacement, including treated drywall, closed-cell insulation, and moisture-tolerant underlayment.
Compare replacement options that match the room’s exposure, such as tile in wet zones or engineered products in living spaces.
When you reinstall, leave proper gaps, fasten securely, and verify humidity stays low so your crew can restore the space safely.
Prevent Mold After Future Flooding
If your area floods again, act fast to keep moisture from lingering and feeding mold growth. You can protect your home by planning for faster drying and better barriers. Choose mold resistant materials, and strengthen moisture control before water returns.
Seal foundation cracks and install backflow valves to limit entry.
Elevate utilities, furniture, and stored items above expected flood levels.
Use sump pumps, dehumidifiers, and ventilation to remove damp air quickly.
Inspect walls, subfloors, and insulation within 24 hours, then dry or remove wet sections.
When you prepare this way, you’re joining a group of homeowners who stay ahead of damage instead of reacting after it spreads.
Your routine should include seasonal checks, drain clearing, and documented emergency contacts for quick response.
Frequently Asked Questions
How Long Before Mold Starts Growing After Water Damage?
You’ll usually see mold growth timeline begin within 24 to 48 hours after water damage, especially if surfaces stay damp. Act fast: dry materials, improve ventilation, and practice water damage prevention to protect your space.
Can I Stay in the House During Mold Cleanup?
You can stay during mold cleanup if the affected area’s sealed and your contractor follows cleanup safety protocols. Protect your mold health by avoiding work zones, using ventilation, and leaving if symptoms appear or odors spread.
Is Bleach Safe for All Mold Removal Jobs?
No, bleach isn’t safe for all mold removal jobs; like Icarus, you’ll find limits. Bleach effectiveness varies by mold types, and you shouldn’t use it on porous materials use proper containment, drying, and targeted remediation instead.
Does Homeowners Insurance Cover Water Damage Mold?
Usually, your homeowners policy covers sudden water damage, but not gradual mold. You should review exclusions, document losses, then start the insurance claim process quickly. Use mold prevention tips to protect your home and coverage.
When Should I Throw Away Furniture After Flooding?
Throw it away when your furniture assessment shows swollen wood, mold, sewage exposure, or contaminated upholstery; otherwise, explore restoration options fast. You’ll protect your home, reduce health risks, and keep your space safe.
Recap
By acting fast, you stop mold before it takes root. Shut off the water, inspect damp materials within 24 to 48 hours, and dry the area thoroughly with fans and dehumidifiers. Remove unsalvageable debris, check inside walls for hidden growth, and wear proper protection during cleanup. If damage is extensive, call mold remediation experts. Think of moisture as a fuse: once it’s lit, every minute matters.