
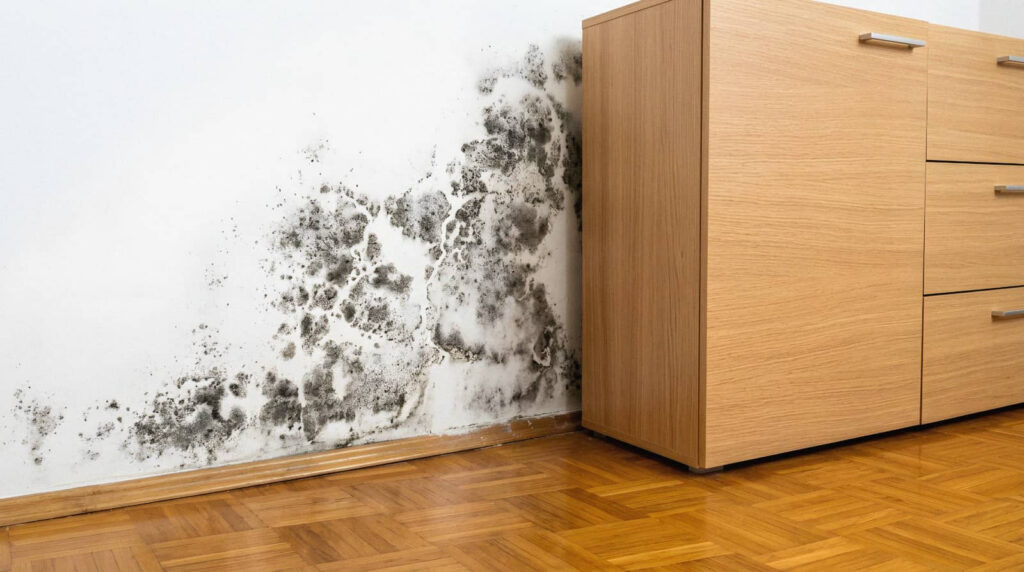
If you suspect water damage, you need to check more than just visible stains. You’ll want to start with surface clues, then use a moisture meter on walls, floors, and trim to catch hidden problems early. Ceilings, cabinets, vents, and window frames can all reveal deeper issues before mold spreads. The key is knowing where moisture hides and when the damage is already beyond a simple fix.
Key Takeaways
- Check for visible signs like damp odors, stains, warped trim, peeling paint, and soft flooring.
- Use a moisture meter to confirm hidden leaks and compare suspect areas with dry spots.
- Inspect floors, baseboards, ceilings, attics, and hidden spaces under sinks or behind stored items.
- Test doors, windows, caulk seams, and weatherstripping for moisture spikes around edges and corners.
- Document elevated readings and call professionals if moisture remains high or spreads after drying.
Start With the Most Common Moisture Signs
Start with the most common moisture signs, because they often show up before any major damage becomes obvious. You can spot trouble by checking for damp odors, stained drywall, warped trim, and peeling paint around windows, ceilings, and baseboards.
Feel along surfaces for cool, clammy spots, and watch for bubbling finishes or darkened patches that spread after rain or plumbing use. Listen for subtle dripping or see if flooring feels soft underfoot.
In a well-maintained home, these clues should be rare, so when you notice them, act quickly and document each area. You’re not overreacting; you’re protecting your space and the people who share it.
Early recognition helps you stay ahead of structural decay, mold growth, and expensive repairs.
Use a Moisture Meter on Walls
If visual clues point to a hidden leak or damp area, a moisture meter lets you confirm what your eyes can’t see. You press the pins or scan head against the wall and compare readings across suspect spots and nearby dry areas.
Different moisture meter types help you choose the right method: pin meters test internal resistance, while pinless meters read surface moisture without leaving marks. Track wall moisture levels in several locations, then note any high readings that cluster around stains, bubbling paint, or soft drywall.
You’ll spot patterns faster when you measure in a simple grid. If one area stays elevated, you’ve likely got active moisture that needs prompt attention. Use the same meter consistently so your results stay reliable and your next steps make sense.
Inspect Floors, Baseboards, and Trim
Next, inspect the floor surface for warping, cupping, soft spots, or discoloration that can signal trapped moisture below.
Check baseboards and trim for swelling, separation, stains, or a loose fit against the wall, since these areas often show damage early.
If you spot these signs, document the affected areas and measure moisture levels to confirm the extent of the problem.
Floor Surface Checks
Walk across the floor slowly and inspect the surface for cupping, warping, staining, or soft spots, since these often signal hidden moisture damage.
Compare floor material types, because hardwood, laminate, vinyl, and tile each show different failure patterns and moisture absorption rates. You can use a flashlight to catch sheen changes, edge lifting, or hairline gaps that indicate the subfloor has taken on water.
Press lightly with your foot in suspicious areas to test resilience, and listen for spongy or hollow sounds. If one section feels cooler or looks duller than the rest, mark it for closer monitoring.
Careful surface checks help you spot early damage, document conditions accurately, and act before moisture spreads through your home.
Baseboard And Trim Inspection
After checking the floor surface, move your attention to the baseboards and trim, where water often shows up as swelling, separation, discoloration, or peeling paint.
Run a flashlight along each edge and look for gaps, cupping, or soft spots. Press lightly with a probe or screwdriver handle; if the material yields, moisture may have entered behind the wall.
Compare baseboard materials, since MDF usually fails faster than solid wood or PVC. Check trim finishes for bubbling, staining, or a dull, uneven sheen that can signal hidden dampness.
You should also sniff for a musty odor and note any caulk cracking.
When you inspect methodically, you’re protecting your space and helping your crew catch damage before it spreads.
Scan Ceilings and Attics for Water
Look up and inspect ceilings and attics for signs of moisture, because water damage often shows there before it appears elsewhere.
You should check for ceiling stains, peeling paint, sagging drywall, and dark rings around fixtures, since these indicate active or past leaks.
In the attic, scan rafters, roof decking, and insulation for dampness, discoloration, or mold-like spotting.
Good attic ventilation helps you spot trouble faster by reducing trapped humidity, so verify vents aren’t blocked and air moves freely.
If you notice wet insulation, trace the source above the stain and document it with photos.
Use a flashlight and moisture meter, if you’ve got one, to confirm problem areas.
When you catch these signs early, you protect your home and stay part of a prepared, informed community.
Look Inside Cabinets and Closets
Open cabinet doors and closet doors to check hidden areas where moisture can collect without being obvious. You should inspect shelves, side panels, and back corners for swelling, stains, peeling finish, or musty odors.
Use a flashlight and run your hand along surfaces to feel for cool damp spots. During cabinet inspections, pay special attention under sinks and around plumbing penetrations, where small leaks often start.
For closet assessments, look behind stored items and near exterior walls, since condensation can build in enclosed spaces. If you see discoloration or warped wood, document it and trace the source quickly.
When you check these areas regularly, you’re protecting your home and joining other prepared homeowners who catch water damage early.
Test Carpets, Padding, and Subfloors
Press firmly on carpets to test for hidden moisture, especially in areas that feel cooler than the surrounding floor.
You can spot carpet moisture by feeling for soft spots, ripples, or a spongy rebound underfoot. Lift a corner and do a careful padding inspection; damp padding often stays wet longer than the carpet face and can hold odors.
If the pad feels heavy, darkened, or compressed, assume water reached the subfloor. Check the wood or concrete below for staining, swelling, or crumbling edges.
Use a moisture meter if you have one, and compare readings across dry and suspect areas.
When you work methodically, you join the group of owners who catch damage early and protect the room’s structure.
Check HVAC Vents and Ductwork
Inspect HVAC vents and ductwork for moisture by removing register covers and checking for rust, staining, condensation, or musty odors inside the openings.
You can then compare each vent’s condition across rooms to spot patterns that suggest hidden water intrusion.
During duct inspection, run your hand near seams and joints for dampness, and look for insulation wrap that feels cool and wet.
Use airflow analysis to note weak or uneven delivery, which can indicate blocked, corroded, or moisture-affected duct sections.
If you find active droplets, shut the system off and document the location.
Clean, dry ducts help your home feel safer and more comfortable, and quick checks keep you connected to the space you share with others.
Spot Moisture in Insulation and Drywall
Moisture in insulation and drywall often shows up first as subtle changes in texture, color, and smell. You can press gently on walls to find soft spots, bubbling paint, or cool areas that stay damp.
Check insulation types by lifting access panels or removing a small section where needed; wet batts, compressed cellulose, or sagging foam signal trapped water.
Examine drywall materials for staining, crumbling edges, or a musty odor that lingers after drying. Use a flashlight to spot dark patches and a moisture meter to compare suspect areas with nearby dry surfaces.
If readings stay high, document the location, limit disturbance, and move quickly so you can protect your space and keep your team informed.
Measure Moisture Around Windows and Doors
Use a moisture meter to check the window frame and compare readings at corners, sills, and adjacent wall surfaces for signs of intrusion.
Then test the door jambs, especially the lower sections and trim joints, where trapped moisture often builds first.
If readings spike near caulk lines or weatherstripping, you’ve likely found a seal leak that needs repair.
Window Frame Moisture
Around windows and doors, you should check the frame, trim, and adjacent drywall for elevated moisture, since these openings are common entry points for leaks and condensation.
During a window frame inspection, use a pin-type moisture meter on wood, drywall, and caulk seams, then compare readings with nearby dry areas. If you spot moisture retention, trace it to failed sealant, damaged flashing, or persistent interior humidity.
- Probe the sill and side jambs.
- Test the lower corners first.
- Record readings in consistent spots.
- Recheck after rain or cleaning.
You’ll catch problems early, protect materials, and stay confident with the rest of your team.
Keep your checks methodical, and you’ll build a reliable moisture baseline for every room.
Door Jamb Checks
After you’ve checked window frames, move to the door jambs and inspect the trim, casing, and lower corners for elevated moisture.
Use a moisture meter on both sides of the door frame, especially near the floor where seepage often settles. Compare readings with nearby dry wood so you can spot abnormal spikes fast.
If you find soft grain, dark staining, or a spongy feel, treat it as a warning sign of wood rot and document the location.
Check both the latch side and hinge side, because moisture can show up unevenly.
In a healthy home, you and your team want tight, stable jambs that stay within normal moisture range.
When readings stay high, you’ve got a clear cue to investigate further before damage spreads.
Seal Leak Detection
To detect seal leaks, check the moisture levels around window and door perimeters, where failed caulk, worn weatherstripping, and small gaps often let water in. Use a pin or pinless meter for accurate leak detection, then compare readings on the interior trim, sill, and adjacent drywall.
- Map readings in a grid.
- Mark any spike above baseline.
- Inspect caulk joints, glazing, and thresholds.
- Recheck after rain or pressure washing.
This moisture mapping helps you spot hidden paths before rot spreads. If you’re part of a crew or a homeowners’ group, share your notes so everyone can stay ahead of damage.
When you pair consistent readings with quick repairs, you protect your space and build trust in the process.
Call Water Damage Pros When Needed
If moisture readings stay elevated, spread beyond one area, or keep returning after drying, you should call water damage professionals right away.
You’ve done the checks; now let experts confirm whether hidden water damage remains in walls, floors, or insulation. A professional assessment uses calibrated meters, thermal imaging, and containment methods that help prevent mold and structural loss.
When you act quickly, you protect your home and stay aligned with the repair team working beside you. Don’t guess if the source is inside a cavity or under flooring.
Pros can trace the intrusion, document conditions for insurance, and recommend targeted drying or demolition. That support saves time, lowers risk, and gives you a clear next step.
Frequently Asked Questions
How Often Should I Check for Hidden Moisture After a Flood?
You should check hidden moisture daily for the first week, then every few days for two to four weeks. During flood recovery, inspect likely moisture sources, watch for odors, and keep using meters until readings stay stable.
Can Humidity Readings Reveal Water Damage Before Stains Appear?
Yes, you can use humidity levels for early detection, but they won’t confirm hidden water damage alone. You’ll notice elevated readings in damp areas, then verify with a moisture meter, inspection, and drying action.
What Moisture Meter Type Works Best for Different Materials?
For wood materials, you’ll usually get the best read with digital meters; for drywall detection, pinless meters work fast. Different tools suit different surfaces, so you’ll keep your bases covered and avoid guesswork.
How Do I Tell Old Water Damage From a New Leak?
You can tell by checking active leak sources, moisture readings, and texture. New leaks feel damp, spread fast, and show sharp edges; old stains are dry, discolored, and stable, helping you feel confident you belong.
Is Mold Always Present When Moisture Damage Occurs?
No, you don’t get a mold cameo with every leak—nature isn’t that generous. You’ll need moisture control and fast drying; mold growth can start later, or never, depending on materials, temperature, and humidity.
Final Thoughts
By checking stains, odors, and hidden damp spots, you can catch water damage before it spreads. Use a moisture meter, inspect floors, ceilings, cabinets, and HVAC areas, and don’t ignore windows or door frames. If readings stay high or damage looks extensive, call a pro fast. Think of it as your home’s early-warning system, a kind of digital canary in a coal mine, helping you stop mold, rot, and costly repairs before they escalate.