
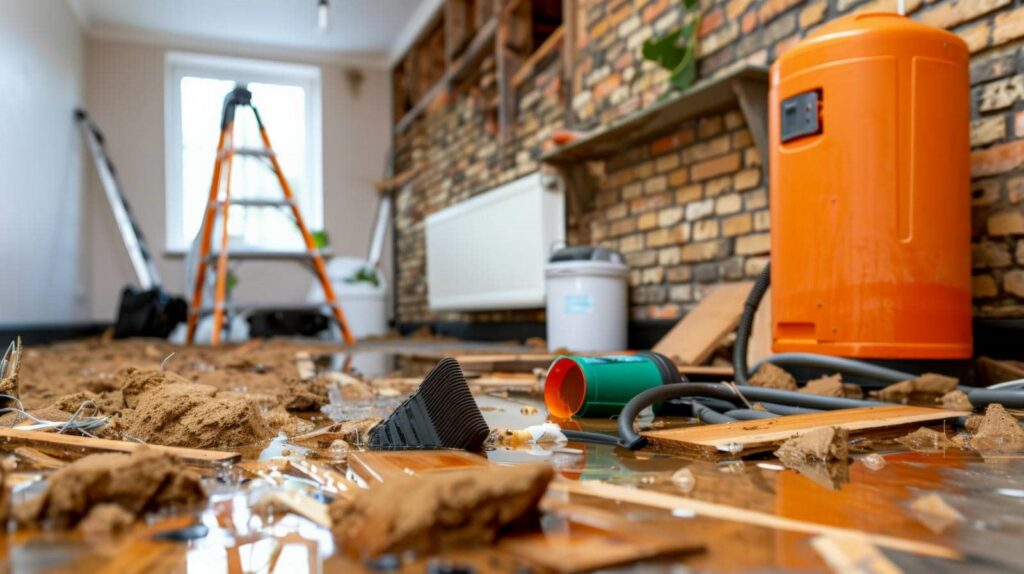
You probably don’t realize that floodwater can keep wicking into subfloors and wall cavities long after the visible water is gone. In a flooded house, you need to stop the source, kill power, and extract standing water room by room, starting at the lowest points. Wet materials, hidden moisture, and mold risk change fast, and the next steps can determine whether you’re dealing with a cleanup or a full repair.
Key Takeaways
- Stop the water source and shut off power to affected areas if it is safe.
- Begin extraction room by room using pumps, wet vacs, and squeegees, starting at the lowest points.
- Remove wet carpets, padding, and soaked furniture quickly to limit moisture retention and damage.
- Use moisture mapping to find hidden water in walls, subfloors, and cavities, then dry those areas thoroughly.
- Sanitize hard surfaces, ventilate the space, and call professionals for contaminated water, electrical hazards, or extensive flooding.
How Emergency Water Extraction Works
Emergency water extraction starts with a fast assessment of the affected areas. Then technicians use pumps, vacuums, and specialized extractors to remove standing water before it spreads into walls, floors, and structural cavities.
You’ll see a focused emergency response that prioritizes speed, moisture control, and access to hidden pockets of water. Effective water extraction techniques target carpets, subfloors, and low points where water collects, helping you limit swelling, contamination, and secondary damage.
Technicians monitor removal rates, check for saturation, and adjust equipment to match the flood depth and surface type. You’re not left guessing; each step follows a clear sequence designed to stabilize the space and prepare it for drying.
That approach helps your home recover faster and keeps your cleanup team working as one.
Stop the Water Source and Shut Off Power
Once extraction is underway, you need to stop additional water from entering the house and cut power to affected areas if it’s safe to do so.
Find the water source fast: close the main valve, isolate a burst appliance line, or contact the utility if you can’t stop it yourself.
Then perform a power shutdown at the breaker panel for rooms with standing water, but never step into floodwater to reach electrical equipment.
If the panel is inaccessible or wet, wait for a licensed electrician or utility crew.
This step protects your team, limits damage, and keeps your response organized.
When you act quickly and safely, you’re doing what experienced property owners do: controlling the hazard before recovery begins.
Remove Standing Water From Rooms
Start removing standing water room by room as soon as the area is safe to enter. Use pumps, wet vacs, and squeegees to speed standing water removal, and move from the lowest point toward exits or drains.
Keep hoses and cords clear so you don’t trip or stall your workflow. If water is deep, use water extraction techniques that match the volume: submersible pumps for larger pools, wet vacuums for residual water, and manual tools for corners.
Work methodically, checking floors for hidden pooling under debris. Wear protective gear and keep the area ventilated. You’re not alone here; steady, organized action helps your team restore control fast.
As each room clears, inspect the surface and repeat until no visible water remains.
Take Out Wet Carpets and Furniture
You should remove wet carpets first because they trap moisture, hold contaminants, and slow drying.
Next, extract soaked furniture carefully, separating solid pieces from upholstered items so you can prevent further damage and reduce mold risk.
Sort each item into salvageable or unsalvageable piles right away so you can prioritize cleanup and disposal efficiently.
Wet Carpet Removal
Remove wet carpets and any furniture sitting on them as soon as it’s safe to enter the room. You’ll reduce hidden moisture, speed cleanup, and protect the subfloor from further damage.
Cut the carpet into manageable strips, then roll each section from the clean edge toward the wet area. Bag or tag material for wet carpet disposal so you can move it out without tracking contaminants. If the padding is saturated, remove it too; it won’t dry quickly enough.
Use gloves, boots, and a mask, and keep children and pets out. After removal, inspect tack strips and baseboards for swelling or staining.
Then start carpet drying techniques on the exposed floor so your team can rebuild together with less risk of mold and lingering odor.
Furniture Extraction Tips
Begin with the heaviest saturated pieces first: lift furniture off wet carpet, then move it to a dry staging area before you extract the flooring beneath. You’ll protect subfloors, reduce wicking, and give your crew room to work.
Use two or more people for bulky items, keep backs straight, and slide furniture on plastic sliders or boards instead of dragging it. If legs are unstable, brace them before lifting.
Strip loose cushions and pads so air can circulate faster. Blot standing water from frames and joints, then start drying with movers, dehumidifiers, and targeted airflow.
For fabric pieces, follow furniture restoration techniques and upholstery cleaning methods as soon as conditions allow. Work methodically, stay coordinated, and treat every move as part of a shared recovery plan.
Salvageable Item Sorting
Sort contents by salvage value before any demolition, and pull wet carpets, padding, and saturated furniture that can’t be dried fast enough.
You should begin damage assessment by separating personal belongings into keep, clean, and discard piles. Use item prioritization to protect photos, records, and heirlooms with high sentimental value and restoration potential.
Check furniture condition for swelling, odor, and delamination; if salvage feasibility is low, move it out to limit mold growth. Document each room with inventory documentation so you can track losses for insurance and recovery.
Keep electronics safety first: unplug items, avoid power strips, and skip use until a pro tests them. Do appliance checks only after a qualified inspection.
When your team works together, you’ll make faster, safer decisions and keep the house moving toward recovery.
Find and Dry Hidden Moisture
Use moisture mapping tools to locate trapped water behind walls, under trim, and in concealed building assemblies.
Open wall cavities and set targeted drying equipment so you can remove moisture before it causes structural damage or microbial growth.
Check flooring underlayment carefully, since wet padding and subfloor layers often hold water long after the surface looks dry.
Moisture Mapping Tools
When floodwater seeps behind walls, under flooring, and into cavities you can’t see, moisture mapping tools help you locate what’s still wet before mold and structural damage spread.
You use moisture detection instruments, like pin and pinless meters, to check surfaces at regular intervals and compare readings across each room.
Mapping technology turns those numbers into a clear drying plan, so you know where saturation remains and where airflow is already working.
Mark every reading on a floor plan or digital chart, then revisit hotspots after extraction. This keeps your crew aligned, prevents guesswork, and helps you prioritize equipment where it matters most.
When you document changes, you prove progress and stay confident that hidden moisture isn’t lingering unnoticed.
Wall Cavity Drying
Moisture mapping often reveals that the wettest material isn’t on the surface at all, but trapped inside wall cavities where floodwater wicks into insulation, drywall, and framing.
You need to open targeted inspection points, then confirm moisture levels with a meter before you start drying. Remove saturated wall insulation if it can’t be restored, and create controlled openings so air circulation can move through the cavity.
Place air movers to sweep across the openings, and use dehumidification to pull vapor from the room.
Check the framing daily, because trapped moisture can linger behind finishes long after surfaces feel dry.
When you work methodically, you protect the structure, reduce odor risk, and stay confident you’re drying the hidden spaces that matter most.
Flooring Underlayment Checks
After surface water is gone, check the underlayment beneath carpet, laminate, vinyl, or tile to find moisture that can stay trapped long after the top layer looks dry. You’ll protect your home’s structure and your team’s work by testing every flooring type with a moisture meter and lifting small sections at edges or seams.
Look for swelling, odor, and darkening.
- Probe near doorways, walls, and low spots.
- Verify moisture barriers haven’t failed or delaminated.
- Remove wet padding, gypsum, or foam before drying.
Keep air moving under exposed areas and document readings as you go. If you catch hidden water early, you reduce microbial growth, protect subfloors, and help everyone get back to a safe, dry space sooner.
Sanitize Surfaces After Flood Water Removal
Once the standing water is gone, you must sanitize every affected surface to reduce contamination and prevent mold growth. Wear gloves, boots, and eye protection, then sort surface materials by type so you can match the right sanitize techniques to each one.
Wash hard, nonporous areas with detergent first, then apply an EPA-registered disinfectant at the label’s contact time. For wood, drywall, and textiles, clean what you can and discard items that stayed soaked or can’t be fully sanitized.
Use clean cloths, separate buckets, and fresh rinse water to avoid spreading residues. Focus on counters, baseboards, cabinets, doorframes, and hidden seams where floodwater leaves film.
Work room by room, and keep your team coordinated so everyone restores a safer home together.
Prevent Mold After Water Extraction
Even after extraction, you need to act fast to keep mold from taking hold, because damp materials can grow spores within 24 to 48 hours.
You can protect your home with proven mold prevention strategies that target moisture and airflow. Start these air circulation techniques:
- Open windows and run fans to move humid air outside.
- Use dehumidifiers to pull moisture from rooms and closets.
- Lift rugs, furniture, and drywall edges so hidden surfaces dry evenly.
Check corners, baseboards, and under cabinets for cool, damp spots. Remove wet contents that can’t dry quickly, and keep HVAC vents clear so air reaches every zone.
When you stay consistent, you’re not just drying a house—you’re helping your space feel safe, healthy, and ready for your family again.
Why Fast Water Removal Prevents More Damage
Fast water removal stops structural deterioration by limiting how long moisture can weaken framing, drywall, and subfloors.
It also reduces mold growth because damp materials give spores the time and conditions they need to spread.
Acting quickly can protect salvageable belongings before they warp, stain, or lose function.
Stops Structural Deterioration
When water sits in a flooded house, it quickly starts weakening structural materials by soaking into drywall, flooring, insulation, and framing.
You need rapid extraction to protect structural integrity before load-bearing components swell, warp, and separate.
Follow emergency protocols now, and you’ll limit hidden deterioration that can spread through joists, subfloors, and wall cavities.
Picture the damage like this:
- A sagging ceiling that creaks under added weight
- A floor panel lifting at the seams
- A wall corner bowing away from its studs
Reduces Mold Growth
Mold can start developing within 24 to 48 hours after a flood, so quick water extraction is one of the most effective ways to cut off growth before it spreads into drywall, insulation, carpet, and hidden cavities.
You reduce moisture at the source, and that gives you real mold prevention, not just cleanup. By removing standing water fast, you also make humidity control easier, since damp air won’t keep feeding spores.
In practice, you should pair extraction with dehumidifiers, ventilation, and moisture checks in walls and floors. That approach helps your home dry evenly and lowers the chance of lingering contamination.
When you act quickly, you protect the space your family relies on and keep small damp spots from becoming a bigger remediation problem.
Protects Salvageable Belongings
Quick water extraction also helps protect belongings you can still save, because the longer water sits, the more it wicks into furniture, flooring, electronics, documents, and porous materials.
You need a fast belongings assessment to sort what’s recoverable and what’s too saturated. Then use salvage techniques that match each item’s material and value.
- Stack dry boxes beside a bowed bookshelf.
- Lift a damp sofa before padding collapses.
- Air out files before ink blurs.
When you act early, you give your crew a better chance to stabilize keepsakes, reduce staining, and stop hidden decay.
That speed matters for your home and your peace of mind, because it keeps your salvageable items in the family, not the landfill.
When to Call Water Damage Pros
Call water damage pros as soon as flooding reaches walls, electrical outlets, HVAC components, or finished flooring, because the longer water sits, the more structural and microbial damage it can cause.
You should also call them if the source is contaminated, if the water keeps returning, or if you can’t safely shut off power.
A professional water damage assessment documents moisture levels, hidden spread, and material risk, giving you clear next steps. That record also helps support insurance claims, especially when you need to prove timely action.
In your home, quick escalation protects you and your neighbors, since shared walls and air spaces can spread odor and dampness.
If you’re unsure, trust the signs: staining, sagging, buckling, or persistent humidity mean it’s time to bring in the crew.
What Happens During Water Damage Repair
Once the damage is assessed and the source is controlled, water damage repair moves in a specific sequence to stop further loss and restore the structure.
You’ll see crews document conditions for insurance claims, then remove wet materials and set containment to protect clean areas.
Next, they extract remaining moisture, dry framing, and sanitize surfaces to limit mold.
Your homeowner responsibilities include approving access, saving receipts, and reporting changes quickly.
- Torn drywall and soaked insulation come out in neat sections.
- Industrial air movers and dehumidifiers create a steady drying zone.
- Technicians test moisture until hidden pockets read safe.
You stay informed through each step, so the process feels organized, not chaotic.
Together, you and the restoration team can move your house from damage control to recovery.
Frequently Asked Questions
How Do I Know if Floodwater Is Contaminated?
You can’t tell for sure by sight alone; you should use floodwater testing and check contamination indicators like sewage odor, discoloration, oil sheen, dead wildlife, or chemical runoff. When in doubt, assume it’s hazardous.
Can I Stay in My Home During Water Extraction?
You can stay home only if crews confirm it’s safe; otherwise, follow safety precautions and arrange temporary accommodations, because a house isn’t Ithaca during extraction—don’t risk exposure, electrical hazards, or structural surprises.
What Items Should Be Saved Versus Thrown Away?
Save sealed documents, photos, electronics, solid wood furniture, and metal items for document preservation and furniture restoration. Throw away soaked drywall, carpets, mattresses, insulation, food, and swollen particleboard because they’ll harbor contamination and structural damage.
How Long Does Flood Insurance Usually Take to Process?
Flood insurance usually takes 30 to 90 days to process—because apparently bureaucracy believes your soaked home can wait. You’ll move faster if you file promptly, document damage well, and verify insurance coverage throughout the claims process.
Do I Need Permits for Major Water Damage Repairs?
Yes, you’ll often need permits for major water damage repairs. You should check permit requirements, repair regulations, restoration guidelines, and local ordinances before you start, so you can protect your home and stay compliant.
Wrap-Up
When you act fast, you protect your home from escalating damage. Water extraction should start immediately, because mold can begin growing in as little as 24 to 48 hours after flooding. You should stop the source, remove standing water, and dry hidden moisture before it spreads into walls and flooring. If the damage is extensive, call water damage pros right away. Quick, methodical extraction gives you the best chance to save materials and reduce repair costs.