
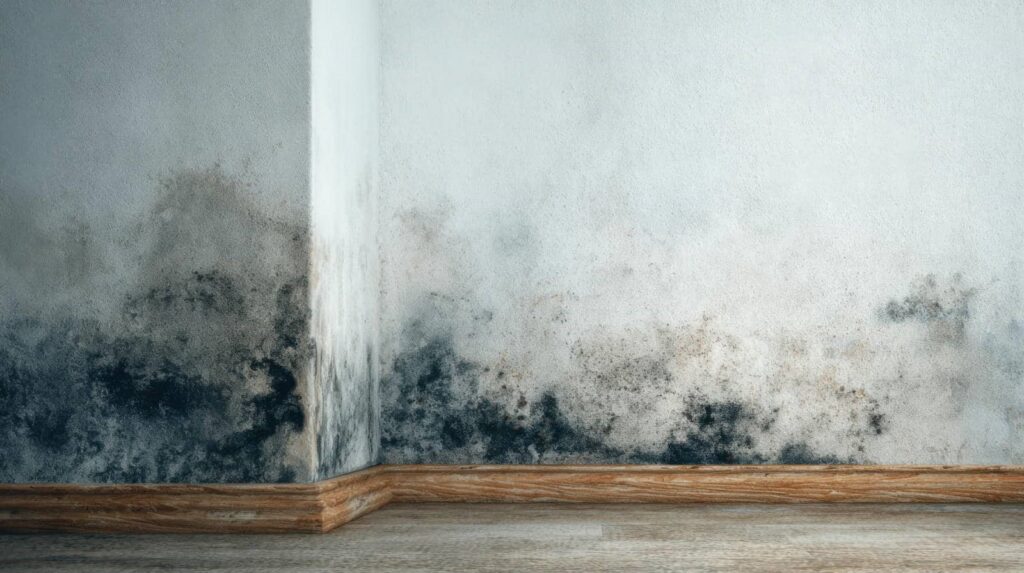
You might notice that the same leak that caused Water Damage and soaked your floor can also create the perfect mold setup. You need to act fast: remove standing water, dry walls and carpets within 24 hours, and keep humidity low with fans and dehumidifiers. Check behind baseboards and under flooring for hidden moisture, and discard materials that won’t dry. One missed wet area can change everything, so the next steps matter.
Key Takeaways
- Remove standing water immediately using pumps, wet vacs, or towels, and check hidden areas for trapped moisture.
- Dry all wet surfaces within 24 hours with fans, dehumidifiers, and good airflow to stop mold growth.
- Lift carpet edges, open wall cavities, and remove wet padding or materials that cannot dry quickly.
- Keep indoor humidity below 60% and monitor damp spots regularly until all materials are completely dry.
- Clean and disinfect water-damaged surfaces, and call mold professionals if odors, stains, or dampness persist.
Remove Standing Water to Prevent Mold
Act quickly to remove any standing water, because the longer it sits, the faster mold can begin to grow. You can protect your home by starting water extraction with pumps, wet vacs, or towels, depending on the amount present.
Then check hidden areas, including baseboards, carpet padding, and subfloors, since trapped moisture can linger after the surface looks dry. A careful moisture assessment helps you spot trouble early and decide where more drying is needed.
If you move methodically, you’ll reduce damage and keep the space safer for everyone who lives there. Focus on complete removal, not speed alone, because even small puddles can support mold later.
When you act as a team, recovery feels more manageable and less overwhelming.
Stop Mold Growth in the First 24 Hours
During the first 24 hours, you need to dry all affected surfaces as fast as possible to limit mold growth.
Use fans, dehumidifiers, and open airflow to reduce moisture, and remove wet materials that can’t dry quickly.
Acting now helps you control damage and lowers the chance of a larger cleanup later.
Dry Surfaces Quickly
The first 24 hours matter most, so you need to dry wet surfaces fast to stop mold from taking hold. Start with the most exposed areas: floors, walls, trim, and built-in surfaces.
Use drying techniques like fans, dehumidifiers, and open airflow to pull moisture out of materials quickly. Keep moisture control steady by checking damp spots with your hand or a meter, then re-position equipment where evaporation slows.
If you can, raise humidity-exposed items so air reaches both sides. Work room by room, and don’t let one area stay cool and stagnant.
You’re not alone in this—quick, methodical drying protects your home and helps your space feel safe again. Track progress each few hours until surfaces feel fully dry and stable.
Remove Wet Materials
Pull out wet materials quickly so mold doesn’t get a foothold in the first 24 hours. You should remove soaked carpet, padding, drywall, insulation, paper goods, and other porous items that can’t dry within a day.
Bag contaminated debris right away, then move it outside to keep spores from spreading through your space. Salvageable furniture and structural pieces need to stay exposed for airflow, not stacked in damp rooms. This step supports mold prevention because you’re eliminating hidden reservoirs that hold moisture.
Keep a close eye on baseboards, subfloors, and wall cavities, and use fans plus dehumidifiers for moisture control. If you’re unsure whether an item can be cleaned, check its material and drying time.
Quick removal helps your household recover together.
Dry Walls, Floors, and Carpets Fast
Once the water source is under control, you need to dry affected surfaces as fast as possible to stop mold from taking hold.
Start by opening wall cavities, lifting carpet edges, and pulling baseboards so trapped moisture can escape. Check moisture barriers and insulation types, because wet hidden layers can keep framing damp long after the surface feels dry.
You should blot standing water from floors, then use clean towels to absorb as much as you can from drywall and carpet backing. Remove damp padding if it won’t dry quickly.
Keep materials separated so air can move through every layer. If you act promptly, you’ll protect your home and your crew, and you’ll reduce the chance that hidden moisture turns into a bigger problem later.
Use Fans and Dehumidifiers Correctly
Place fans so they move air across wet surfaces and out of the room, but don’t aim them directly at moldy areas that could spread spores.
Set your dehumidifier to keep indoor humidity below 60%, and empty or drain it often so it can run continuously.
When you use both tools together, you’ll speed drying and lower the chance of mold growth.
Fan Placement Tips
To dry water-damaged areas quickly and prevent mold, position fans so they move air across damp surfaces and toward an exit point, not straight into a corner where moisture can linger.
Choose the right fan types for the space: box fans, axial fans, or air movers all work, but each needs proper fan orientation. Aim them low for floors, slightly upward for walls, and stagger them so airflow overlaps without blasting one spot.
Keep doors open when you can, and leave a clear path for air to leave the room. You’re not doing this alone; good setup makes the space dry faster and safer.
Check for cool, damp patches after a few hours, then adjust angles until surfaces feel evenly aired.
Dehumidifier Settings
Set your dehumidifier to keep indoor humidity below 60%, and if the room is still wet, run it continuously until surfaces dry.
You’ll get the best results when you place it in the largest open area and keep doors closed, so moist air doesn’t drift back in.
Use ideal settings that match the room size and temperature; cooler rooms may need a lower setting to pull water from the air efficiently.
Check the bucket or drain line daily, and do regular dehumidifier maintenance by cleaning the filter and coils.
When paired with fans, this steady drying helps your space recover faster and lowers mold risk.
Stay patient—you’re doing the right things, and your home can dry out safely.
Increase Airflow While Drying
Good airflow speeds evaporation and helps stop mold from taking hold, so open windows when weather allows, run fans across wet surfaces, and keep interior doors open to move humid air out of the space.
You’ll dry materials faster when you create steady air circulation and avoid dead corners where moisture lingers. Place box fans so they push air through the room, not in circles, and use ventilation strategies that pull damp air outside whenever possible.
If you’ve got multiple affected rooms, stagger fans to guide airflow from the driest area toward the wettest one. Check that vents aren’t blocked by furniture or debris.
You’re not doing this alone; simple, consistent airflow helps your home recover and supports the whole cleanup effort.
Clean and Disinfect Water-Damaged Surfaces
Once the surfaces are dry enough to handle, clean them promptly to remove dirt, silt, and residue that can feed mold growth. You’ll reduce risk by using effective cleaning supplies and a disinfectant labeled for the material you’re treating.
Work in small sections, scrub gently, and rinse as needed so you don’t spread contamination. These mold prevention strategies help you stay in control and protect the space you share.
- Wear gloves and eye protection.
- Use clean water and fresh cloths.
- Follow product contact times exactly.
- Dry the area again after cleaning.
If you’re unsure about a surface, test a hidden spot first. With steady, careful cleaning, you’re supporting a healthier recovery and helping everyone feel safe in the room.
Throw Out Materials That Hold Moisture
Some materials should be thrown out instead of dried, especially if they stay damp for long or are hard to clean completely. You can protect your home by discarding mold prone materials like soaked carpet padding, gypsum board, ceiling tiles, insulation, upholstered furniture, and particleboard.
These items trap water inside their structure, so moisture retention stays high even after surface drying. When you remove them quickly, you cut the chance that mold can spread to nearby belongings and living areas.
Wear gloves, seal waste in bags, and move it out promptly. If you’re unsure whether an item can dry fully, choose the safer option and replace it.
You’re not overreacting; you’re reducing risk and helping your space return to a healthy, comfortable state.
Check Hidden Areas for Trapped Water
After the visible water is gone, check hidden areas where moisture can linger and feed mold. You’ll protect your space by inspecting places that often trap water and delay drying. Open cabinets, lift rugs, and look behind appliances for hidden leaks.
Feel baseboards, drywall edges, and flooring intersections for dampness. Use a flashlight to scan crawl spaces, attics, and wall cavities for moisture traps.
- Check under sinks and around supply lines
- Inspect behind toilets, washers, and refrigerators
- Test closets, corners, and insulation near exterior walls
- Run fans or dehumidifiers where air feels stagnant
If you catch trapped water early, you can dry it out before it spreads. You’re part of a group that knows careful checks save time, money, and stress.
Spot Early Mold Signs in Damaged Areas
Now that you’ve checked for trapped moisture, look closely for early mold signs in the damaged areas. You can spot trouble by scanning for discoloration, speckling, or fuzzy growth on drywall, trim, and flooring.
A musty odor often appears before visible colonies, so trust your nose as one of your mold detection techniques. Watch for peeling paint, warped materials, and damp staining that doesn’t improve as surfaces dry. These are early warning signs that moisture is still feeding spores.
Use a flashlight to inspect corners, baseboards, and behind furniture, and compare affected spots with nearby clean surfaces. When you notice changes quickly, you stay ahead together with the rest of your home recovery plan, reducing spread and keeping your space safer.
Call Mold Remediation Experts When Needed
If you still smell mold, see recurring stains, or notice moisture that won’t dry, it’s time to call a mold remediation expert.
You’ll get a trained assessment, proper containment, and targeted removal that helps prevent the problem from spreading.
Professional remediation can also lower health risks and give you a safer path to restoring the damaged area.
Signs You Need Help
When does water damage cross the line from a cleanup job to a mold problem? If you still smell musty odors after drying, you likely need help.
Visible spotting on drywall, warped flooring, or recurring dampness means moisture sources are still active. Watch for health risks like sneezing, coughing, or headaches that improve when you leave the area.
When your cleanup stalls, use these signs to choose professional restoration methods and prevention tips that fit your home.
- Wet materials still feel cool after 48 hours
- Stains return after wiping
- Hidden leaks keep feeding humidity
- You can’t reach crawlspaces, walls, or insulation
You’re not overreacting; you’re protecting your space and everyone in it.
Benefits Of Remediation
Remediation restores control by removing hidden mold, drying affected materials, and stopping the moisture conditions that let growth return.
You also reduce health risks by limiting spores, dust, and contaminated debris that can trigger breathing issues or irritation.
When you act quickly, you cut long term costs by preventing wider structural damage and repeated repairs.
Professional teams use targeted containment, filtration, and disposal methods that improve safety and lower environmental impact because they waste less material and avoid unnecessary demolition.
This approach also helps protect property value by documenting cleanup and preserving finishes, framing, and insulation.
If damage is extensive, call mold remediation experts when needed so you stay connected to a reliable solution and return your space to a healthier, stable condition.
Frequently Asked Questions
What Health Symptoms Can Mold Exposure Cause?
Mold exposure can cause allergy symptoms, respiratory issues, coughing, wheezing, sneezing, eye irritation, and headaches. You might also feel fatigue or throat irritation. If symptoms persist, you should get checked and protect your space.
How Much Does Professional Mold Remediation Typically Cost?
You’ll usually pay $500-$6,000 for professional mold remediation, depending on damage. Think of it as sealing a leaking roof: your mold prevention tips and remediation methods protect your home, health, and community.
Will Insurance Cover Mold Damage After a Flood?
Usually not by standard homeowners policies; you’ll need flood insurance for flood-caused mold. Check your mold coverage limits, document damage fast, and call your insurer. You can often strengthen claims with prompt drying and cleanup.
Can Mold Grow Inside HVAC Ducts After Water Damage?
Yes, mold can grow inside your HVAC ducts after water damage—because damp, hidden spaces rarely stay harmless. You should inspect ducts, improve HVAC maintenance, and dry them fast to protect air quality and your home.
How Do I Test if Mold Is Present Indoors?
You can test for mold using visual inspections, moisture meters, air samples, and surface swabs. These mold testing methods help assess indoor air quality, and you’ll get clear, practical guidance from a qualified inspector.
Recap
When water invades your home, treat it like a fast-spreading shadow: you beat it by acting first. Remove standing water, dry every surface within 24 hours, and keep fans and dehumidifiers working to lower humidity. Open hidden spaces, inspect behind walls, and discard materials that stay damp. If you spot mold or can’t dry an area fully, call remediation experts. With quick, careful steps, you’ll protect your home before the shadow takes hold.