
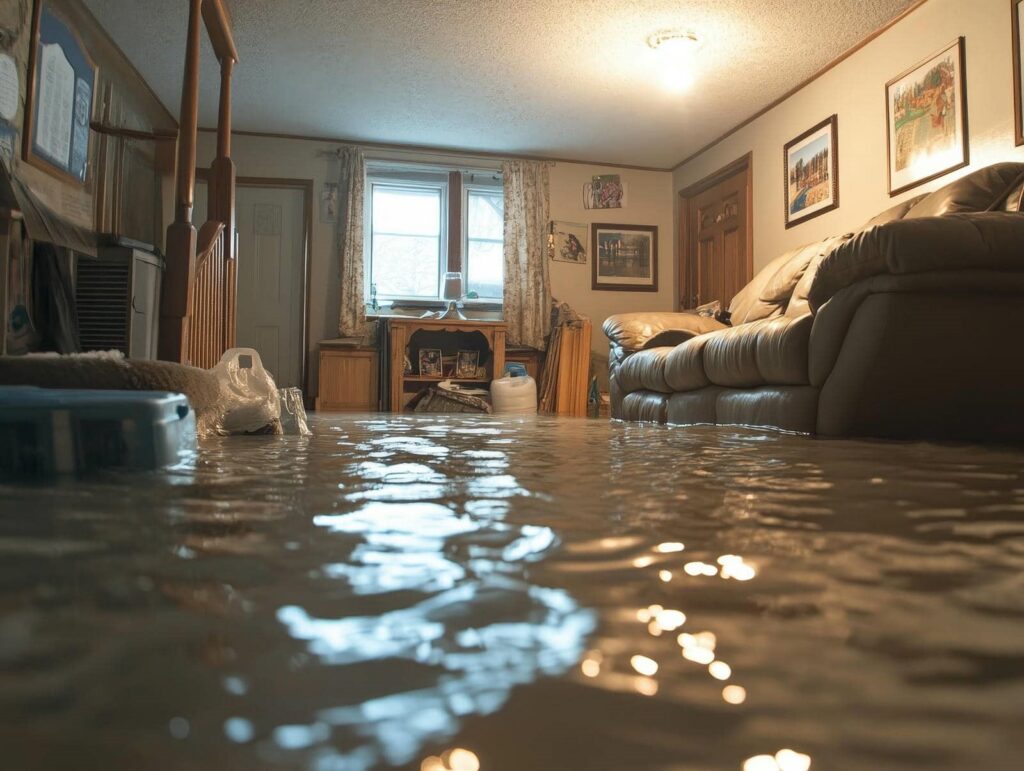
You assess the damage, you protect your safety, and you act fast. After Flooding, you need to check structural stability, document every defect, and remove standing water before it spreads deeper into walls, floors, and furniture. Then you dry the space, clear out damaged materials, and stop mold before it takes hold. The final steps can determine whether you salvage the home or face a much larger repair bill.
Key Takeaways
- Assess structural damage from outside first, document everything, and avoid entry if the home appears unstable.
- Shut off power to flooded areas, wear protective gear, and watch for wiring hazards, gas leaks, and sharp debris.
- Remove standing water quickly with pumps or siphons, working in sections and directing water to approved drainage points.
- Dry the home thoroughly using fans, dehumidifiers, and ventilation; remove saturated materials and discard moldy drywall.
- Complete repairs only after inspections, then document all work with photos and receipts for insurance claims.
Assess Flood Damage Safely
Before you enter a flooded home, stop and check the structure from outside: look for sagging ceilings, cracked walls, leaning foundation lines, and signs of electrical or gas hazards.
You’ll protect yourself and your household by documenting every visible defect with photos and notes. Contact your flood insurance carrier early, because accurate records can support your claim and speed decisions.
Wear safety equipment if you must approach the building, including boots, gloves, and a hard hat. Check doors and windows for warping, and note standing water depth, mud lines, and damaged utilities.
If the frame looks unstable, keep out and call a licensed inspector. You belong in a recovery plan that starts with facts, not guesswork, so verify conditions before any cleanup or repairs.
Stay Safe During Flood Cleanup
Even after you’ve confirmed the structure is stable, treat the cleanup zone as hazardous and work in a controlled sequence. You should shut off power to affected areas, then inspect for exposed wiring, gas odors, and sharp debris before stepping farther in.
Wear protective gear, including waterproof boots, gloves, goggles, and an N95 mask, so you can reduce contact with contaminated water and airborne particles. Keep your team together, communicate each task, and mark unsafe rooms so no one enters alone.
Wash hands often, change out of wet clothing quickly, and disinfect tools after each use. For flood safety, take breaks, stay hydrated, and stop if you feel dizzy, nauseated, or overwhelmed; your crew’s well-being matters.
Remove Flood Water Quickly
Once the area is safe, pump and siphon standing water out as quickly as possible to limit structural damage and mold growth.
Use emergency pumps first in the lowest areas, then move water toward drains, sumps, or a discharge point approved by local officials.
If you’ve got a crew, assign one person to monitor hoses, one to clear debris, and one to track water depth.
For floodwater extraction, work in sections so you can measure progress and avoid recontaminating already cleared spaces.
Keep power cords dry, and shut off equipment before repositioning it.
Empty containers and vacuumed water outdoors, away from your foundation.
Stay methodical, document the process, and keep your household aligned on the plan.
Speed matters, but controlled removal protects your home better.
Dry Flood-Damaged Walls, Floors, and Furniture
Start by removing wet materials and opening windows. Then use fans and dehumidifiers to dry the walls evenly without trapping moisture inside.
You should inspect flooring for warping or swelling and keep drying until the subfloor and surface layers are fully dry.
For furniture, clean off debris, dry each piece thoroughly, and discard anything that stays saturated or shows structural damage.
Dry Walls Safely
Before you dry any flood-damaged walls, floors, or furniture, remove standing water, open windows if conditions are safe, and use fans and dehumidifiers to keep air moving.
You should also pull baseboards and drill small holes near the floor to let trapped moisture escape. Test wall cavities with a moisture meter, then keep drying until readings return to normal.
For mold prevention, clean visible contamination with detergent and water, and discard drywall that stays damp longer than 24 to 48 hours.
If you need wall treatment, apply only after the structure is fully dry and sound. Watch for swelling, soft spots, or musty odors, and stop if you see electrical damage.
When you work together methodically, you protect your home and make recovery feel manageable.
Restore Floors And Furniture
Move quickly to restore floors and furniture once the area’s safe to enter. Remove standing water, then circulate air with fans and dehumidifiers.
Lift rugs, baseboards, and any warped flooring so subfloors can dry evenly. Check for soft spots, mold odor, and loose seams before you choose flooring options. Salvage hardwood by cleaning, drying, and weighing boards flat; replace materials that’ve buckled or delaminated.
For furniture restoration, separate wood, metal, and upholstered pieces. Wash hard surfaces with mild detergent, then dry joints fully. Discard cushions and particleboard items that stayed soaked too long.
Document damage, label parts, and keep fasteners together so you can work as a team with contractors or family. When you act methodically, your home can feel whole again.
Remove Damaged Materials Before Mold Starts
Remove soaked drywall as soon as you can, since it holds moisture and quickly becomes a mold source.
Cut out and discard any ruined insulation that stayed wet after the flood.
Bag the debris, seal it, and clear it from the work area before you replace materials.
Remove Soaked Drywall
Cut out any drywall that stayed wet after the flood, since saturated gypsum loses strength quickly and can trap moisture in the wall cavity.
Use a utility knife to score clean lines above the waterline, then remove each section carefully to limit dust.
Check behind the surface with moisture detection tools so you don’t leave damp pockets in place.
You and your crew should wear gloves, eye protection, and an N95 or better.
Bag the pieces right away for drywall disposal, and keep the work area organized so everyone can move safely.
If the lower edge feels soft, extend the cut until you reach sound material.
Treat every wet section as a risk until the wall cavity is open, dry, and ready for the next repair step.
Discard Ruined Insulation
Once the wall cavities are open, pull out any insulation that got wet, compacted, or contaminated by floodwater, because it won’t dry evenly and can hold moisture against framing.
Wear gloves, a respirator, and long sleeves, then bag the waste immediately so you don’t spread debris through the house.
Check each bay by insulation type: fiberglass batts, cellulose, and foam all fail differently, and you’ll often need to replace the whole section.
Inspect moisture barriers for tears, gaps, or trapped water, and cut them free if they’re holding damp material.
Keep the team’s work area clean and label salvageable framing so you can rebuild with confidence.
When you remove ruined insulation now, you protect your home from hidden mold and make the next steps safer.
Finish Repairs and Restore Your Home
After the structure has dried and the major hazards are addressed, you can finish repairs by restoring damaged surfaces, systems, and fixtures in a controlled order.
Start with drywall, trim, and flooring, then reconnect electrical, plumbing, and HVAC components only after inspections clear them. Match materials to the original build where possible so your home improvement work stays consistent and durable.
Document every completed step, receipt, and photo for insurance claims, and keep samples of damaged materials if your insurer requests proof.
Reinstall cabinets, doors, and hardware, then repaint with moisture-resistant coatings.
Test all outlets, fixtures, and appliances before regular use.
Take the final walkthrough with your crew or family so everyone knows the home is safe, functional, and ready again.
Frequently Asked Questions
How Do I Document Flood Damage for Insurance Claims?
You document flood damage by taking date-stamped photos, listing affected items, and noting damage assessment details. Use documentation tips like receipts and measurements, then share copies with your insurer to strengthen your claim and support recovery.
When Should I Call a Professional Restoration Company?
Call a professional restoration company immediately when flooding leaves standing water, contaminated materials, or hidden moisture. You’ll get a faster emergency response, a clearer restoration timeline, and support from people who understand what you’re facing.
Can I Keep Food That Touched Floodwater?
No—you shouldn’t keep food touched by floodwater. For example, if your basement freezer flooded, discard everything inside. Floodwater compromises flood safety and requires food disposal. You can’t clean porous packaging, and contamination risks aren’t worth it.
How Do I Prevent Pests After a Flood?
Remove standing water, dry materials fast, seal cracks, and store food tightly. You should call pest control early, because flood prevention starts with sanitation, debris removal, and monitoring for insects, rodents, and mold-loving pests.
What Permits Are Needed for Major Flood Repairs?
You’ll usually need flood repair permits for structural, electrical, plumbing, and HVAC work; most post-flood projects need approvals. Check local regulations first, or you’ll risk delays, fines, and rejected inspections.
Wrap-Up
When the water recedes, you begin rebuilding more than walls—you restore the home’s heartbeat. Think of each dry board and repaired seam as a candle relit after a storm. If you document damage, dry every surface, remove what can’t be saved, and finish repairs carefully, you protect both structure and memory. Stay methodical, keep safety first, and let each completed step mark a return to steadiness, resilience, and a home that feels whole again.