
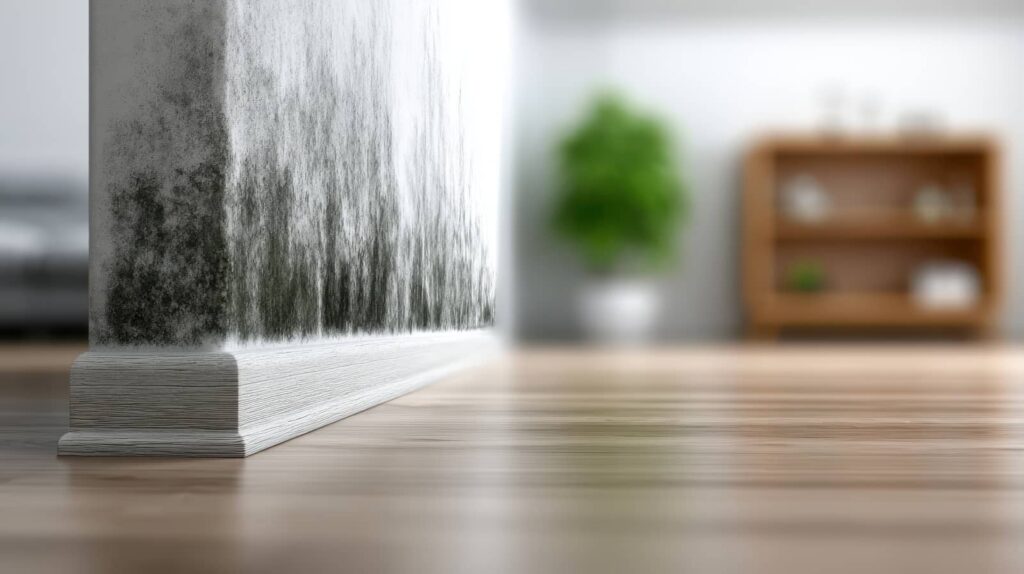
Mold After Home Flooding can develop quickly if you don’t act fast. After flooding, you need to stop the water source, remove standing water, and dry the structure before mold can take hold. You should inspect walls, floors, and insulation for hidden moisture, then wear proper protection while cleaning contaminated areas. Some materials can be saved, but others must be removed. The key question is knowing what to clean, what to replace, and when the damage has gone too far.
Key Takeaways
- Stop the water source, remove standing water, and use fans and dehumidifiers to dry the area quickly.
- Inspect for mold in drywall, baseboards, insulation, and hidden spaces using visual checks and moisture meters.
- Remove and discard porous materials like soaked drywall and insulation that cannot be thoroughly cleaned.
- Wear protective gear such as an N95 respirator, gloves, and goggles, and keep children and pets away.
- Call a mold professional if contamination is widespread, hidden, or affecting HVAC systems, or if odors persist after drying.
Stop the Flood and Dry the House
First, stop the water source and get the house drying immediately. Shut off valves, patch the break, and call utility help if you can’t isolate the leak.
Then remove standing water with pumps, wet vacs, or buckets, working room by room so your team stays organized. Open windows only if outdoor air is dry, and run fans and dehumidifiers to move moisture out fast.
Pull wet rugs, furniture pads, and soaked contents to reduce load on the structure. Protect electrical areas before you enter them. Document damage for claims and coordinate your emergency response plans with everyone in the household.
Build flood prevention strategies now, so you’re ready next time. Keep airflow steady until surfaces feel dry and humidity drops.
How to Spot Mold After Flood Damage
After the water is under control, inspect every affected area for visible mold growth, musty odors, and moisture damage.
Check drywall, baseboards, insulation, carpet backing, and hidden cavities with a flashlight and mirror. Look for discoloration, fuzzy patches, staining, and warped materials.
Use mold identification techniques like blot testing, moisture meter readings, and labeled photo documentation to track suspect spots.
Pay attention to early warning signs such as peeling paint, bubbling finishes, and damp air near walls or floors.
When you notice these clues, mark the area and limit traffic to protect your household team.
Stay systematic, because careful observation helps you catch problems early and keeps you connected to a safer, healthier home.
Why Mold Grows Fast in Wet Homes
Mold spreads quickly in wet homes because moisture, warmth, and organic building materials create ideal growth conditions within 24 to 48 hours.
You’re dealing with a fast mold lifecycle: spores land, absorb water, and colonize porous surfaces such as drywall, wood, and insulation.
When humidity levels stay above 60%, growth accelerates and colonies can expand through hidden cavities before you notice visible spotting.
Floodwater also leaves behind nutrients, so even clean-looking surfaces can support growth if they remain damp.
To stay on track, treat every wet area as active contamination until you dry it fully and verify conditions are normal.
In a shared recovery effort, quick action protects your home, limits spread, and helps you regain control together.
How to Protect Yourself During Cleanup
Before you start tearing out damaged materials, protect yourself from mold exposure with the right gear and work habits.
Wear an N95 respirator, gloves, goggles, long sleeves, and boots to reduce direct contact. Keep children, pets, and other helpers out of the area so your team stays focused and safe.
Open windows when weather allows and use fans only if they won’t spread spores to clean rooms. Wash exposed skin after each shift, change clothes before entering living spaces, and bag contaminated items separately.
If you feel wheezy, dizzy, or irritated, stop and reassess. These health precautions support personal safety and help your household work together with confidence during cleanup.
How to Clean Up Mold Safely
You should wear protective gear, including gloves, goggles, and an N95 respirator, before you handle any mold-contaminated surfaces.
Remove and discard porous materials that you can’t fully clean, such as drywall, insulation, and carpet padding.
Keep the work area contained so you don’t spread spores to clean sections of the building.
Wear Protective Gear
Suit up with protective gear before you begin any mold cleanup to reduce exposure to spores and contaminated debris.
Wear protective clothing that covers your skin, including long sleeves, long pants, gloves, and closed-toe boots. Choose safety equipment that fits snugly and stays in place while you work.
Use an N95 respirator or better to limit inhalation of airborne particles, and add goggles without vents to protect your eyes.
If your gear tears, gets soaked, or becomes heavily soiled, stop and replace it. Keep clean gear separate from the work area so you don’t spread contamination.
Remove Contaminated Materials
Start by removing porous materials that can’t be cleaned thoroughly, such as wet drywall, insulation, carpet, carpet padding, and ceiling tiles. You’ll protect your space and help your team avoid spread.
Use mold identification techniques to confirm affected areas before demolition, then seal debris in heavy-duty bags for contaminated material disposal. Keep the work zone isolated and ventilated.
- Cut out damaged sections with minimal disturbance.
- Double-bag waste and label it clearly.
- Clean remaining surfaces with detergent and water.
- Dry the area fast to stop regrowth.
If you find hidden mold behind walls or under floors, stop and reassess. You’re building a safer recovery, and careful removal keeps everyone on the same page.
When to Replace Drywall, Insulation, and Carpet
You should replace drywall if it shows swelling, crumbling, persistent staining, or mold growth behind the surface.
Remove carpet and insulation when they stay wet longer than 24 to 48 hours, retain a musty odor, or can’t be fully dried and cleaned.
When materials are porous and contaminated, replacement is the safest way to stop hidden mold from spreading.
Drywall Replacement Signs
If drywall, insulation, or carpet stayed wet for more than 24 to 48 hours, treat them as candidates for replacement rather than repair.
During your drywall inspection, look for mold indicators like staining, softening, bulging, or a musty odor. You’re not overreacting; you’re protecting your home and your crew.
- Replace drywall if it crumbles, delaminates, or wicks moisture above the flood line.
- Replace insulation if it’s compressed, sagging, or holds odor after drying.
- Replace carpet if backing separates, pads stay damp, or fibers trap contamination.
- Document each area with photos before removal and check adjacent framing.
If you and your team spot recurring mold indicators, act fast.
Fast decisions reduce spread and help you move forward with confidence.
Carpet And Insulation Removal
Remove carpet and saturated insulation as soon as replacement is the safer call, especially when wet materials have held water beyond 24 to 48 hours or show mold, odor, or structural breakdown.
You should cut carpet into manageable strips, remove padding, and keep contaminated layers separate for carpet disposal. Bag debris sealed, label it, and follow local waste rules.
If the subfloor is sound, dry it fast with airflow and dehumidification before reinstalling. Replace fiberglass, cellulose, or batt insulation that stays wet, compresses, or smells musty; it can trap spores and lose R-value.
Choose insulation alternatives that resist moisture when you rebuild. Inspect drywall edges, baseboards, and tack strips for staining or softness.
You’re protecting your home and your crew’s confidence by removing compromised materials quickly and cleanly.
How to Clean Mold From HVAC Ducts
Before you clean mold from HVAC ducts, shut off the system at the thermostat and breaker, then inspect the ductwork, vents, and air handler for visible growth, moisture, and damaged insulation.
Wear gloves, goggles, and an N95 respirator so you stay protected while you work with your crew’s standards.
- Remove registers and vacuum loose debris with a HEPA unit.
- Scrub hard surfaces with detergent and water; don’t soak liners.
- Wipe accessible metal ducts, then dry every surface completely.
- Replace contaminated filters and call a qualified duct cleaner if mold growth extends beyond reach.
For effective HVAC maintenance, clean and dry components fast, because damp dust feeds renewed contamination.
You’re restoring a safer, healthier airflow for everyone inside.
How to Prevent Mold After Flooding
Once you’ve cleaned HVAC ducts and other visible mold, stop new growth by removing moisture fast and keeping indoor humidity below 60%.
Open windows only if outdoor air is dry, and run fans and dehumidifiers in affected rooms. Remove soaked carpet, pad, drywall, and insulation within 24 to 48 hours.
Wipe hard surfaces with detergent and dry them completely. Check hidden spaces under cabinets, behind baseboards, and inside closets for dampness.
Seal small leaks, drain standing water, and maintain good airflow around walls and furniture. Keep indoor humidity control steady with a hygrometer and empty dehumidifier tanks often.
These mold prevention strategies help you protect your home and keep your household safe, comfortable, and ready to recover together.
When to Call Mold Remediation Experts
Call mold remediation experts when the affected area is larger than 10 square feet, when mold keeps returning, or when contamination is in HVAC systems, wall cavities, or other hidden spaces.
You’ll protect your home and fit with others who take remediation seriously. Request a mold assessment before you disturb materials. A qualified crew can verify moisture sources, contain spread, and choose the right removal method.
- Call sooner if anyone has asthma or symptoms.
- Stop DIY work when porous materials stay wet.
- Get expert consultation if odors persist after drying.
- Document damage for insurance and repair planning.
You don’t need to guess. If you can’t confirm full drying, visible colonies, or safe containment, bring in specialists.
They’ll help you restore your space efficiently and safely.
Frequently Asked Questions
How Long Does Mold Remediation Usually Take?
You’ll usually need one to five days for small jobs, but larger infestations can take weeks. Remediation techniques, moisture control, and drying speed affect mold growth, so you’ll want professionals to assess your site promptly.
Does Homeowners Insurance Cover Flood-Related Mold Damage?
Usually, no like a locked gate, your policy may block mold claims after flooding. You’ll need flood insurance, check coverage limits, note policy exclusions, and act fast on mold prevention to protect your claim.
Can Mold Return After Professional Cleanup?
Yes, mold can return after professional cleanup if you leave moisture, hidden contamination, or poor ventilation. You’ll reduce mold regrowth factors by fixing leaks, drying materials fast, and maintaining preventive measures consistently.
How Much Does Mold Testing Cost?
You’ll usually pay $300-$700 for mold testing. You might think it’s unnecessary, but mold testing methods vary, and mold inspection importance helps you choose wisely. You’ll protect your home and confidence with targeted results.
Should I Move Out During Mold Removal?
Yes, you should move out if the mold health risk is high or the removal process will disturb large areas. You’ll protect your household, support recovery, and let contractors work efficiently and safely.
Wrap-Up
To restore your home after flooding, you need to act fast: stop the water, dry every surface, and remove damaged materials before mold can take hold. You should inspect, clean, and protect yourself at every step. Think of moisture as mold’s invitation leave it, and mold moves in. Keep humidity low, watch hidden spaces, and call experts if growth spreads. Quick, careful action now can save your home, your health, and your wallet.